
1. Dandelion Puff With Tiny Star-Fillers
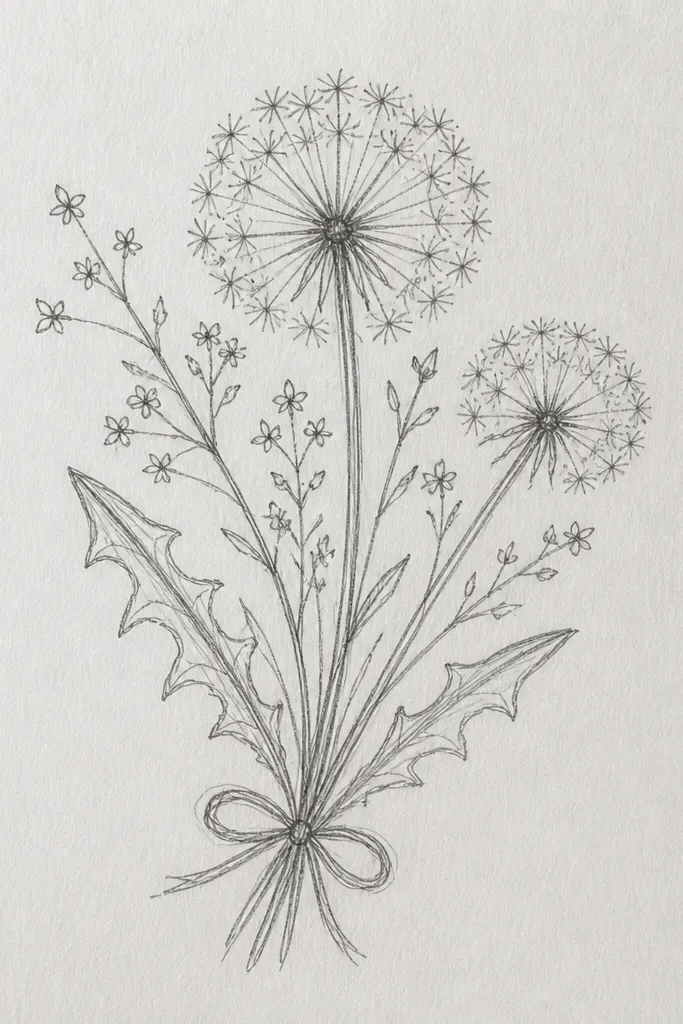
Start with a single dandelion puff as the focal blob. The key is making the puff look airy by drawing many short, curved seed lines that taper at the ends — not one big outline. Add tiny star-like buds around the puff so the bouquet feels full even if you keep the center simple. Color it with pale yellows and a cool shadow at the base to create that dreamy, floating look. This works great for budget sets because you only need one warm color and one gray-blue for depth. It’s also easy to fit into a small sketchbook page.
Step 1 — Draw a light circle, then erase or lighten the circle lines so the puff is made from 30-60 short seed strokes radiating outward. Step 2 — Place 6-10 small star buds around the perimeter using five-point shapes with tiny centers. Step 3 — Add stems as thin, slightly curved lines that disappear behind the puff so the focus stays on the bloom. Finish with colored pencil: light yellow on the seeds, then a bluish gray shadow under the puff and where buds overlap.
Keep your seed strokes uneven in length — perfect symmetry makes it look flat.
Don’t ink the entire puff with one thick outline; it kills the airy effect.
2. Lavender Sprig Bouquet With Slender Buds
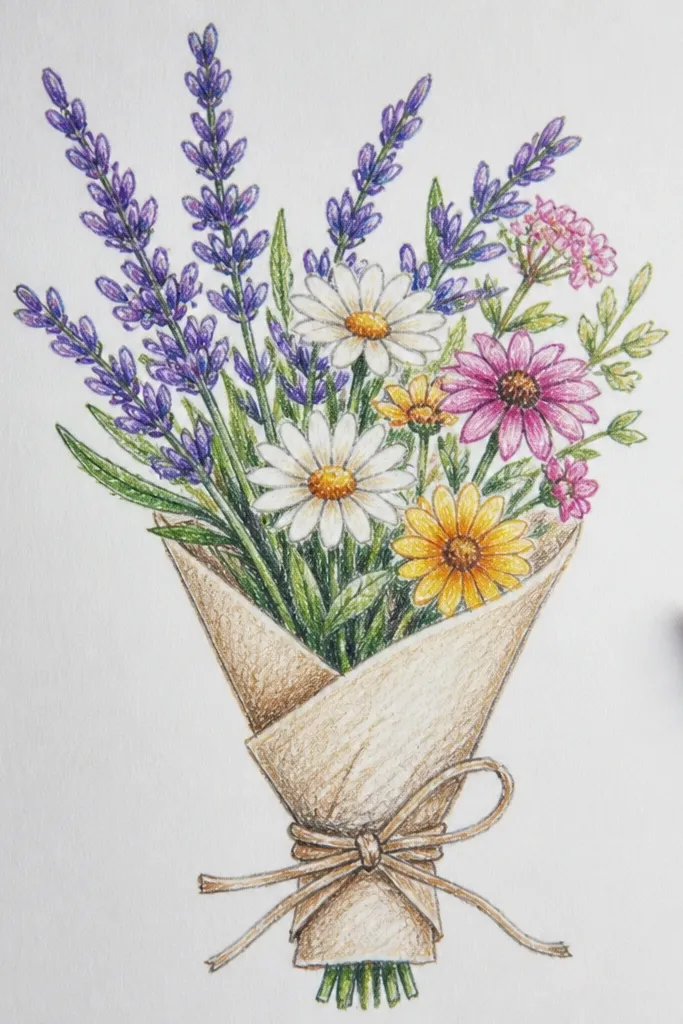
This bouquet looks “dreamy” because lavender flowers read as soft spikes, not hard petals. Draw 2-3 long sprigs that overlap, then add small buds along each one like tiny beads. The overlapping spikes create depth without complicated shading. For color, use muted purple and let paper tone show through — that negative space is what makes it feel soft. Add a few narrow leaves only at the base so the whole piece doesn’t turn into a tangled mess. It’s ideal if you want an aesthetic bouquet that still takes under an hour.
Step 1 — Sketch the main stems as two gentle curves that meet near the bottom, then branch into three sprigs. Step 2 — On each sprig, draw short vertical bud marks along a center line, keeping the bud marks slightly different lengths. Step 3 — Add 3-5 narrow leaves near the base, angled outward. Step 4 — Color with light purple first, then darken every other bud line with a deeper violet only at the base of each bud.
Good to knowLeave tiny gaps between buds — those gaps make the lavender look breathable.
Common mistakeSkip heavy outlines on the buds; thin purple layers look better than thick ink.
3. Wild Rose Cluster With Uneven Petal Edges
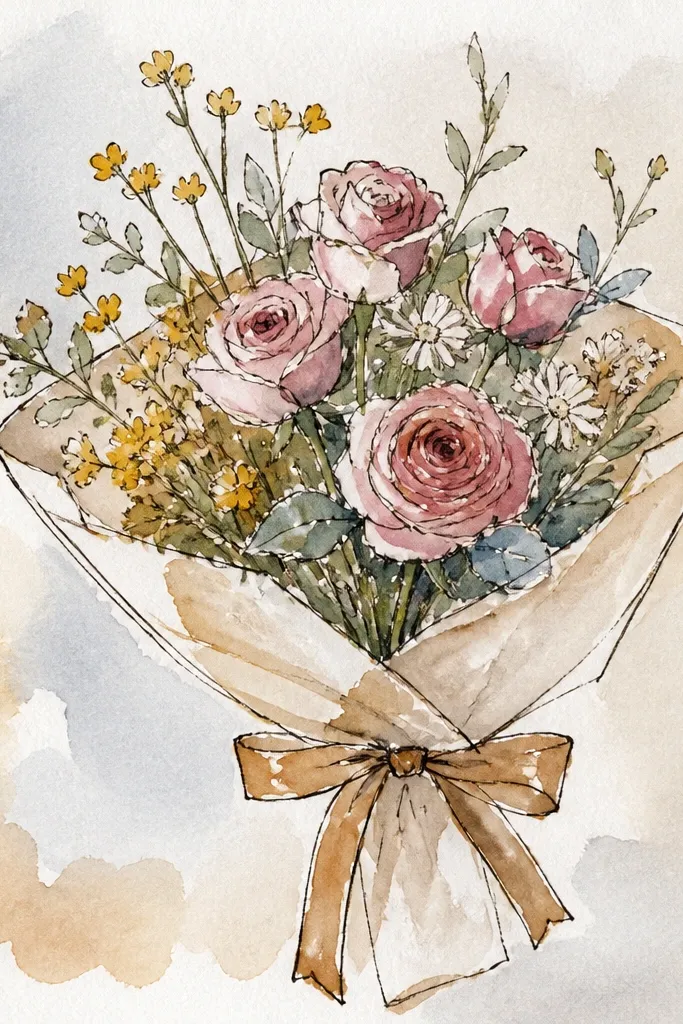
Wild roses look gorgeous because each bloom is slightly different. Draw three small roses instead of one big one, then angle them so petals overlap. The trick for the dreamy look is uneven petal edges — draw petals like soft scallops, not perfect teardrops. Shade the inside of each rose with a warm pink-brown mix, then cool the shadows with a faint gray-blue. Add a few simple leaves and one bud at the side to make the cluster feel like a real bouquet. This is a great option if you want detail without spending time on perfect realism.
Step 1 — Block in three circular centers lightly, then sketch 6-8 outer petals around each center with scalloped edges. Step 2 — Add overlap by drawing one rose slightly behind another using lighter line weight and lighter color. Step 3 — Draw a small side bud as a tight oval with 4-5 wrapped petals. Step 4 — Color: light pink wash on outer petals, darker warm shade on inner folds, and gray-blue under overlapping petals.
Shade the petal creases first; then color the outer edge last so the bloom looks dimensional.
Don’t make all petals the same size — that’s how roses start looking like clip art.
4. Cornflower Blue Arc Bouquet
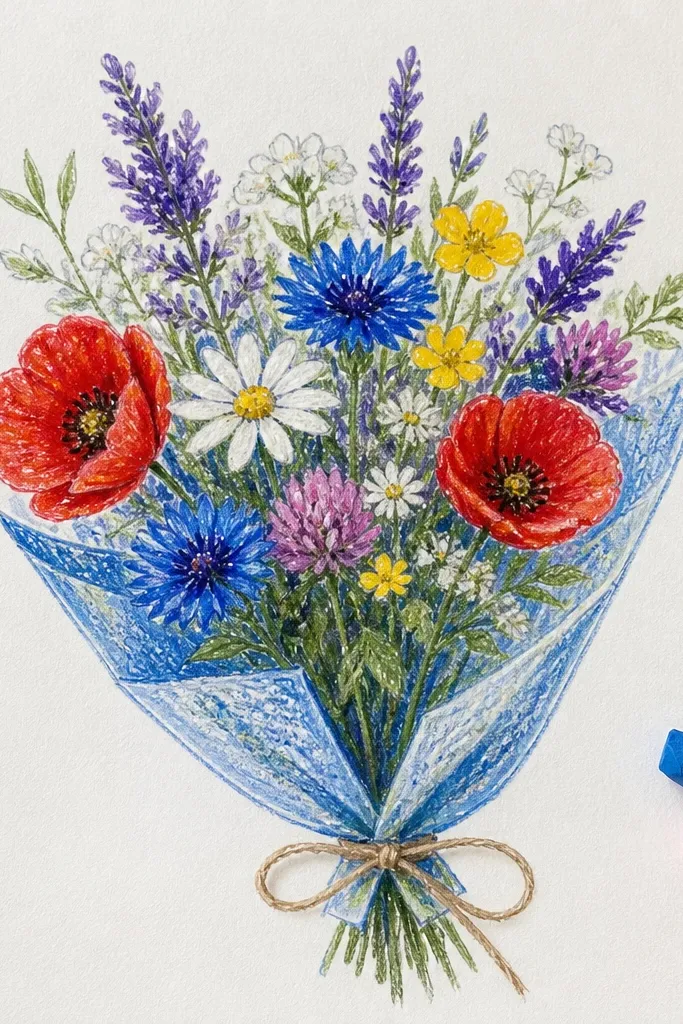
Cornflowers are photogenic because the petals are flat and the center is distinct. Build the bouquet as an arc: 5-7 flowers that step upward across the page. Keep each flower’s center dark and crisp, then let the petals stay slightly translucent with a lighter blue. This gives you that airy, dreamy vibe without needing complex shading. Add thin stems and a few narrow leaves that follow the arc direction. The result reads as seasonal and sweet, and it looks great in a horizontal photo.
Step 1 — Draw an arc guideline across your page, then place flower centers along it with small circles. Step 2 — For each center, draw 6-8 flat petals using short curved lines that meet at the center, leaving some petal edges uncolored. Step 3 — Add thin stems that connect each flower to the base, and include 3-4 narrow leaves on the lower third. Step 4 — Color petals in light to medium cornflower blue, then deepen the petal base with a darker blue near the center.
Use one dark color for centers only; it keeps the bouquet from looking muddy.
Don’t shade the whole petal uniformly — leave lighter areas to keep it dreamy.
5. Wild Daisy Spiral Bouquet
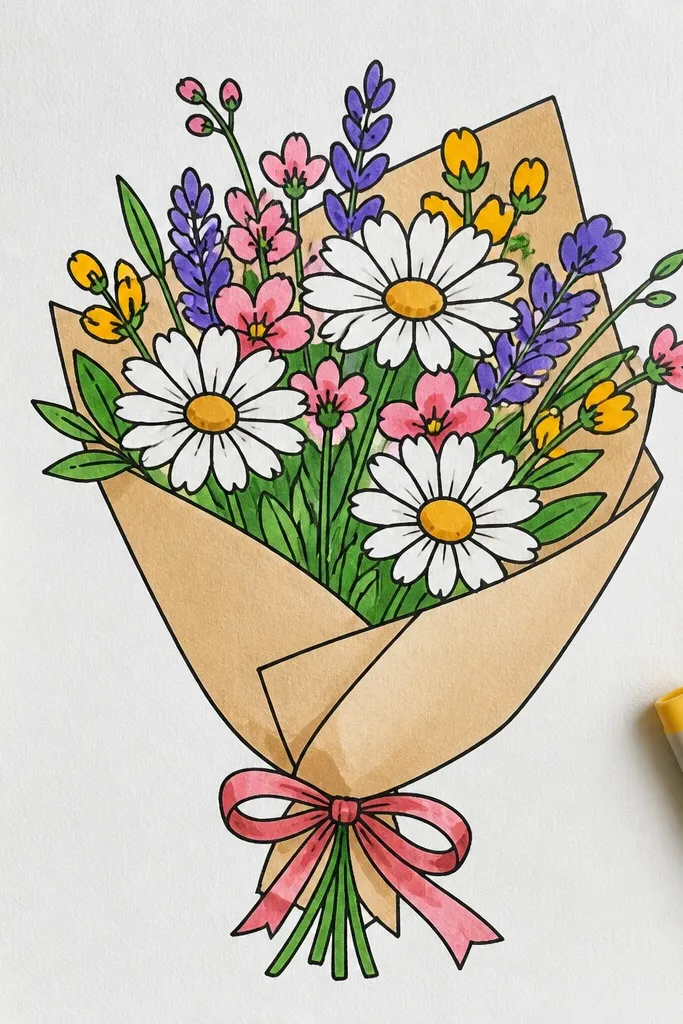
A spiral arrangement is a cheat code for “finished” looking drawings. Start with daisies as your main shapes, then place smaller buds and leaf sprigs between them so the spiral feels full. The daisies keep the piece clean because you can draw each one with the same repeatable petal pattern, then vary size slightly for depth. The dreamy part comes from soft shading around the spiral and letting the paper tone show. This works well for budget tools because daisies don’t require lots of different colors. It also photographs nicely because the spiral pulls the eye.
Step 1 — Draw a loose spiral from the bottom center to the top right, then place one daisy center at several points along the spiral. Step 2 — Draw 12-16 thin petals around each center, alternating long and short petals to avoid symmetry. Step 3 — Add tiny buds as small ovals with 2-3 petal lines and tuck leaves between daisies. Step 4 — Color: yellow centers with a darker ring, then light gray-blue shading under overlapping petals along the spiral path.
Good to knowKeep petals slightly uneven in spacing; that’s what makes it feel wild.
Common mistakeAvoid thick ink on every petal; use ink mainly for outer edges and centers.
6. Poppy and Dusty Grass Bouquet
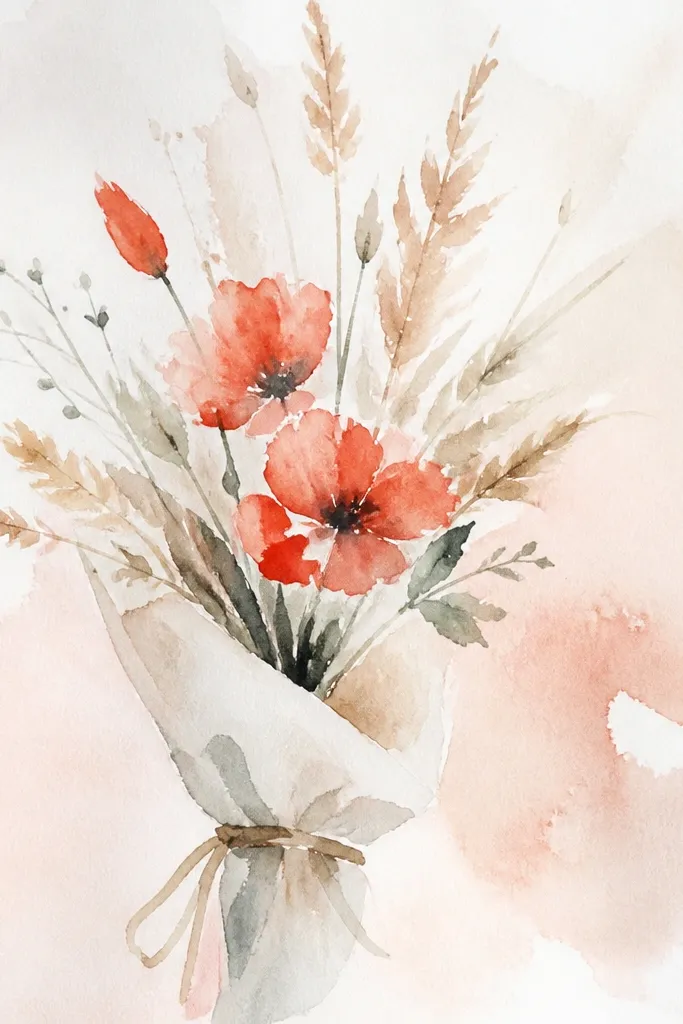
Poppies give you a bold focal point, and the dusty grass adds softness. Draw one larger poppy in the center, then surround it with lighter, wispy grasses that curve outward. The balance of one heavy bloom and lots of fine lines makes the bouquet look intentional instead of chaotic. For color, use a muted red or coral, then add a dusty gray shadow at the base of the petals. The grass can stay mostly uncolored except for a light green-gray — it keeps the poppy from getting crowded. This is a great idea for a quick sketch that still looks artsy in photos.
Step 1 — Sketch the poppy outline: a rounded cup shape with 4-6 petal segments and a darker center. Step 2 — Draw thin grass stems radiating outward, each made from 3-5 tapering lines like a small feather. Step 3 — Add 2-3 tiny seed pods near the grass bases for extra wild texture. Step 4 — Color the poppy petals lightly, then deepen shadows where petals overlap; color the grass with a thin gray-green layer.
Make the grass lines fade as they go outward — lighten pressure halfway through each stem.
Don’t over-red the center; keep the darkest red just around the folds.
7. Peony-Look Wild Bloom With Budding Sides
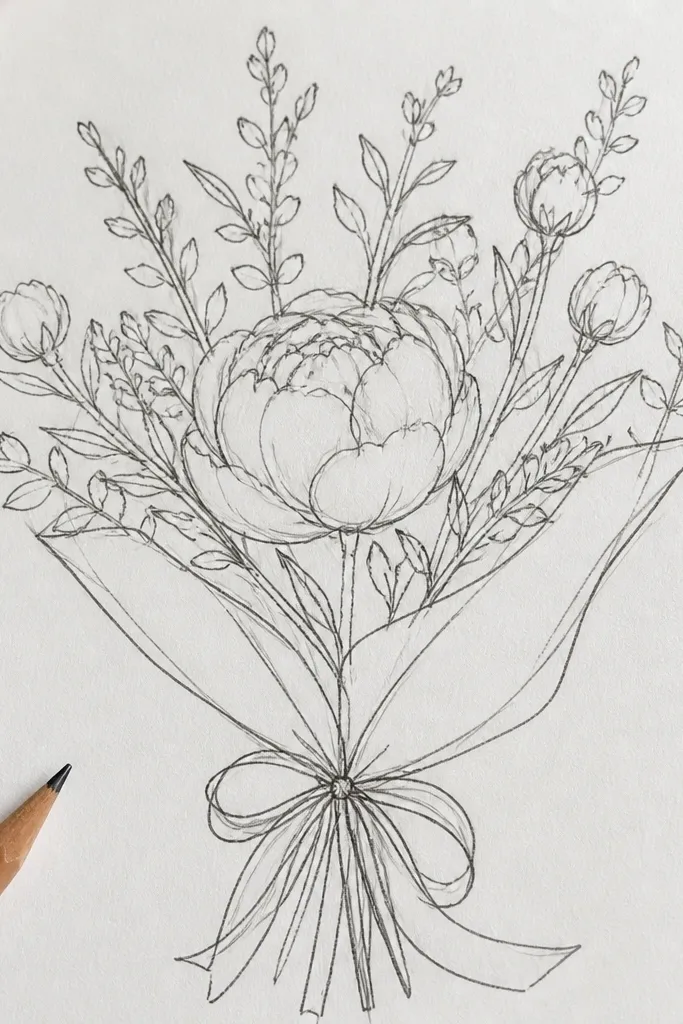
This idea gives you a peony vibe without needing perfect petals. Draw one big bloom in the middle with layered, loose petals that curl slightly inward. Then add two smaller buds on the sides — one open, one still tight. The dreamy look comes from petal layering: overlap lines, then shade only along the inner curves so it reads as volume. Keep the palette small: one main pink or rose shade, plus a cool shadow color. This works for budgets because the layered petal pattern is repeatable and doesn’t require many different flowers.
Step 1 — Draw a soft oval center, then add 10-14 petals around it as curved arcs with slightly ragged edges. Step 2 — Place two buds: a tight oval with 3-4 petal lines for the closed bud, and a smaller open bloom with 6-8 petals for the side bloom. Step 3 — Add a few leaves that frame the bottom of the big flower, keeping them simple. Step 4 — Color in layers: light pink first, then deepen the inner petal folds with a darker rose and add cool gray-blue shading under overlaps.
Good to knowUse the same petal shape but change the size — consistency makes it look “designed.”
Common mistakeDon’t draw every petal with the same outline thickness; vary line weight for depth.
8. Sweet Vetch and Baby Leaves Bouquet
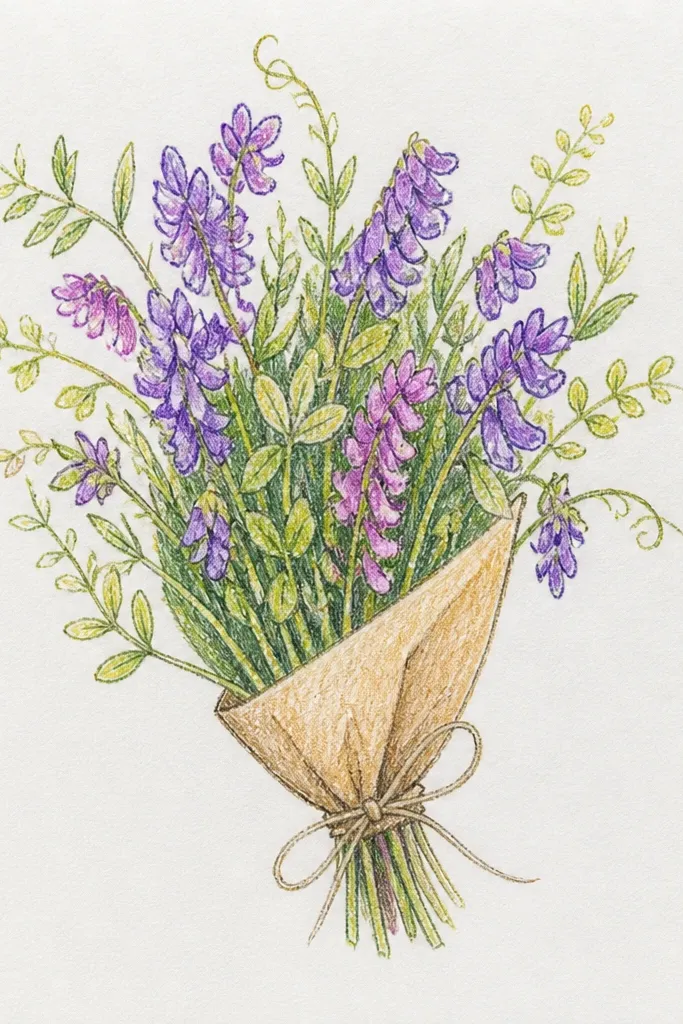
Small clustered wild flowers look dreamy when you treat them like a pattern, not a detailed botanist drawing. Draw a few main stems, then build clusters at the ends with tiny teardrop blossoms. Add baby leaves along the stems — simple curved shapes with one midline is enough. This bouquet is photogenic because the clusters create texture while the stems keep it airy. Color stays soft: gentle mauve or pale lavender blossoms with light green leaves. It’s also a good “confidence builder” if you’re new to wild bouquets.
Step 1 — Sketch 3 stems that rise from one base point, then mark 2-3 cluster spots on each stem. Step 2 — At each cluster spot, draw 8-12 tiny teardrop blossoms around a small center point. Step 3 — Add baby leaves as small ovals with a single line down the middle, placing them between clusters. Step 4 — Color: light mauve blossoms, pale green leaves, and a soft gray-blue shadow at the base of each cluster.
Good to knowLet clusters overlap slightly; it makes the bouquet look fuller without adding more flowers.
Common mistakeSkip heavy outlines around every tiny blossom — that turns the cluster into a dark blob.
9. Wild Violet and Stem-Drift Bouquet
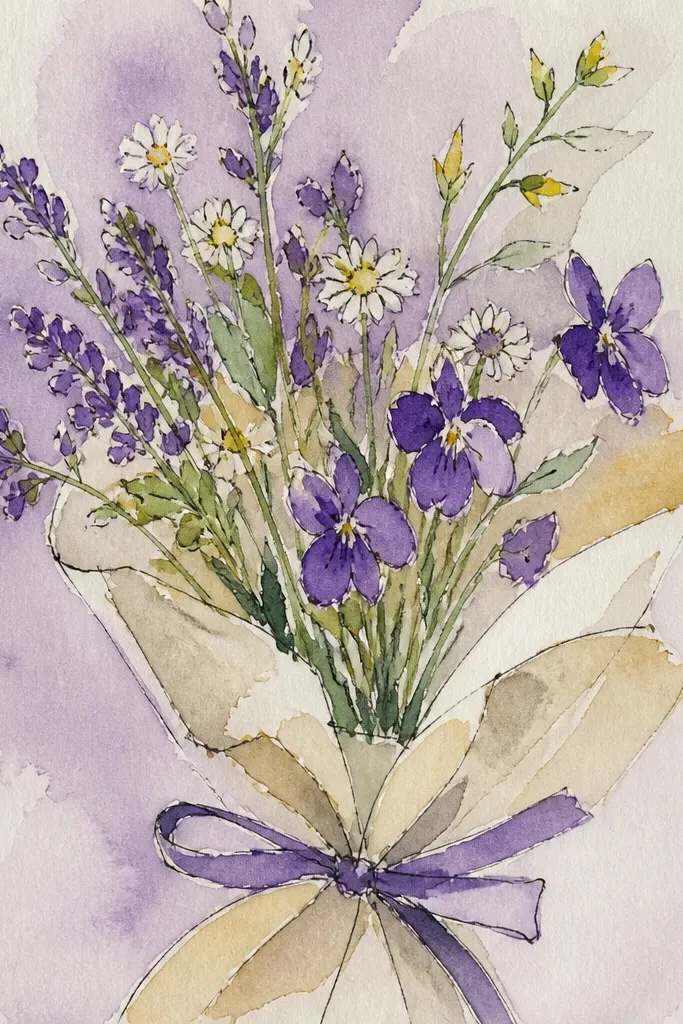
Violets look dreamy because they’re small, slightly irregular, and easy to repeat. Draw 7-10 violet flowers along a few drifting stems that curve like they’re caught in a breeze. Each violet has a top petal and two side petals; keep the shapes slightly uneven so it feels wild. Add small, narrow leaves that point in different directions. The look is airy, and it photographs well on textured backgrounds because the flowers are light and spaced. This is a smart choice when you want a bouquet with lots of movement but still keep it simple.
Step 1 — Draw 2-3 long stems with gentle curves, then place violet “footprints” along them. Step 2 — For each violet, draw three main petals: one top petal and two smaller side petals, then add a small dot center. Step 3 — Add narrow leaves between flowers using simple teardrop shapes with one vein line. Step 4 — Color petals in pale violet, then add a deeper violet shadow under the side petals and near the stem.
Good to knowKeep the spacing varied; tight clusters in one area make the rest feel softer.
Common mistakeDon’t make every violet identical; tiny shape differences are what keep it charming.
10. Sunflower Mini Bouquet With Feathery Centers
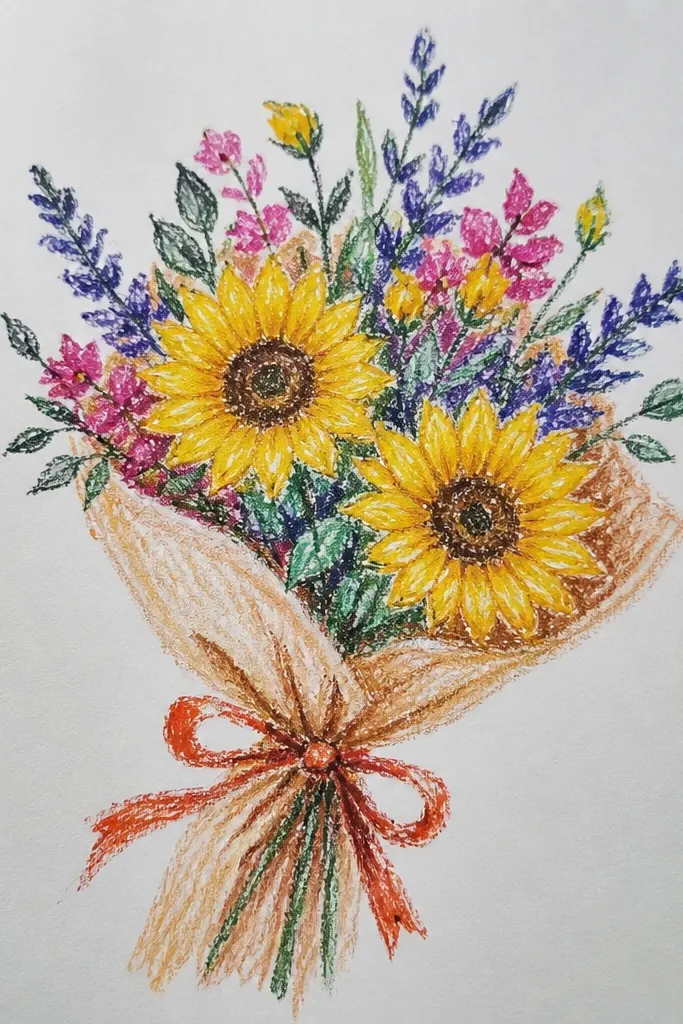
Mini sunflowers are instantly readable in a sketch and they photograph beautifully because the center texture catches attention. Draw 3-5 small sunflowers, each with a ring of petals and a center that looks like a scribbled seed mass. The dreamy look comes from keeping petals warm but light, then shading the underside with a slightly darker yellow-orange. Add a few leafy sprigs to anchor the bouquet. This idea works with limited supplies because you can do centers with simple pencil hatching and finish with a warm color wash.
Step 1 — Sketch 3-5 circle centers, then add 12-18 petals as short curved lines around each circle. Step 2 — Texture the centers with tight pencil scribbles or short hatch marks, leaving a tiny lighter spot for sparkle. Step 3 — Connect stems to the base and add 2-3 leaf shapes with a midline. Step 4 — Color: light yellow petals, deepen the petal base with orange, and lightly color the center with brown-orange while leaving some pencil texture visible.
Good to knowLeave the center slightly darker than the petals; it prevents the bouquet from looking washed out.
Common mistakeDon’t fully color over the center texture — pencil texture is part of the look.
11. Anemone-Style Bouquet With Dark Centers
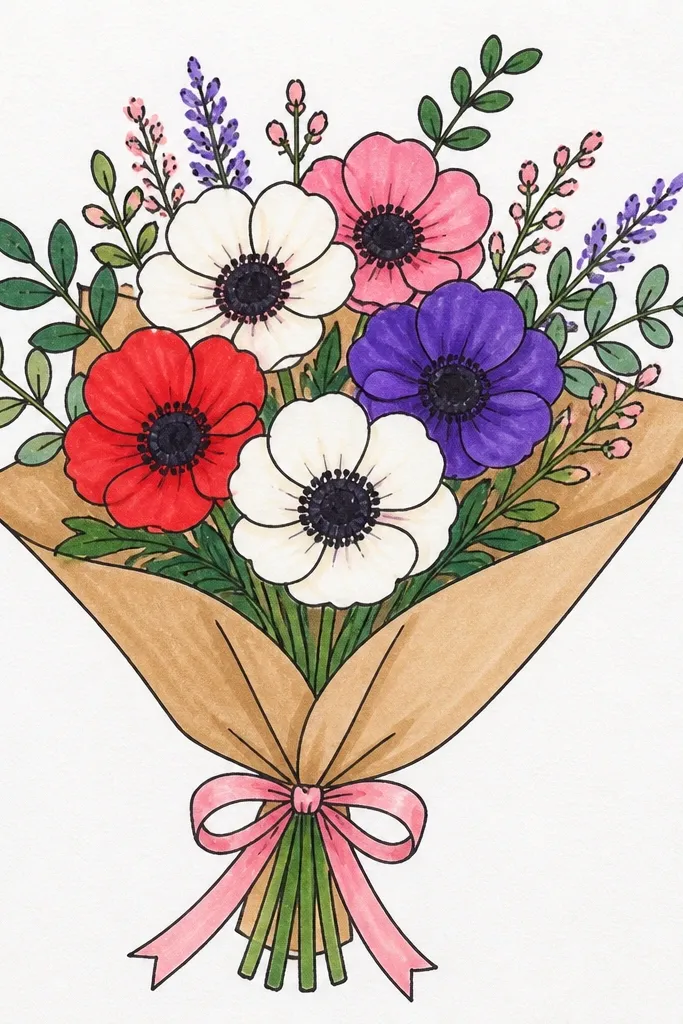
Anemone-style flowers look dramatic even when you draw them simply. Make the center a deep, near-black circle, then draw 6-10 petals around it with soft, slightly curled edges. Arrange 4-6 blooms so they overlap and form a loose bouquet shape. The dreamy quality comes from gentle shading and clean contrast between dark centers and pale petals. Use one petal color (cream, blush, or pale lavender) and one shadow color. Add a few thin stems and minimal leaves so the dark centers stay the focal point.
Step 1 — Draw 4-6 circles for centers, then place petals as rounded teardrops that touch the center lightly. Step 2 — Overlap blooms by drawing one set of petals partially behind another using lighter line weight. Step 3 — Add thin stems and two small leaves near the bottom only. Step 4 — Color: keep petals light, then shade under each petal edge with gray-blue; fill centers with dark color and add a small highlight spot.
Good to knowA tiny highlight in the center makes the whole bouquet look more dimensional.
Common mistakeAvoid coloring petals too dark; pale petals are what make the centers pop.
12. Gypsophila Cloud Bouquet With Airy Clusters
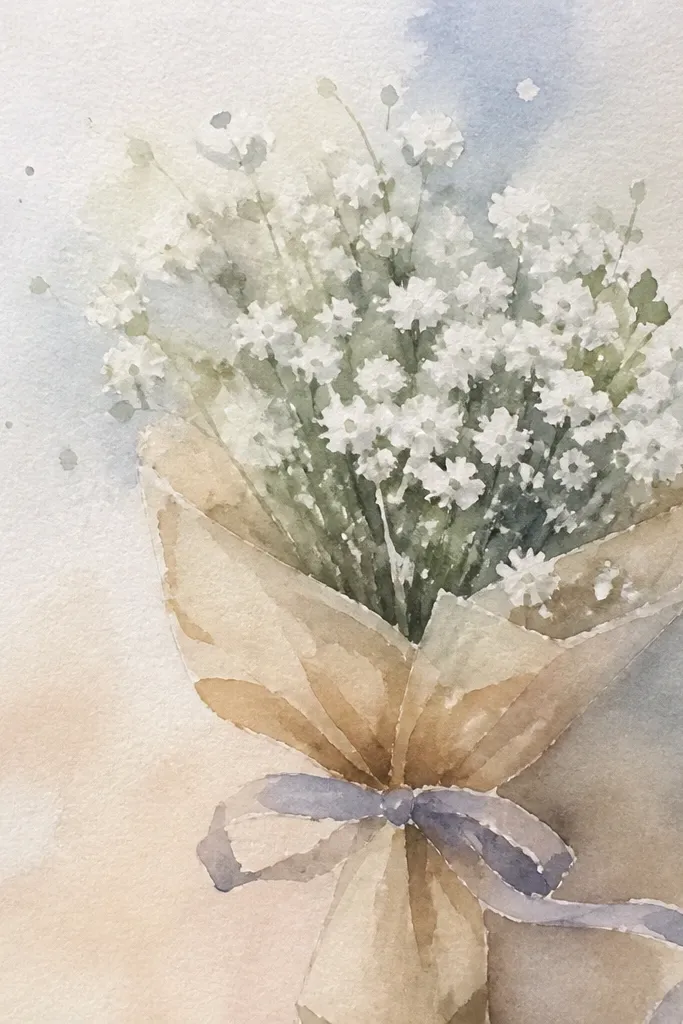
Gypsophila-style bouquets look dreamy because they’re basically a cloud of tiny blooms. Draw a cluster mass where the bouquet sits, then fill it with many small “balloon” flowers — tiny circles with a short V-shaped petal hint. Keep the cluster edges soft and uneven. This gives you a photogenic, airy look with minimal color — light gray-blue shadows do most of the work. Add just a few longer stems at the bottom so the cloud has a base. It’s also extremely budget-friendly because you repeat the same tiny flower shape.
Step 1 — Lightly sketch the bouquet silhouette as a lumpy teardrop or cloud shape. Step 2 — Fill inside with 30-60 tiny blooms: draw a small circle and add two short petal lines like a V. Step 3 — Add 3-5 thin stems at the bottom and connect them to the cloud. Step 4 — Shade with colored pencil by adding a gray-blue layer under the cloud edges and wherever clusters overlap.
Good to knowVary the size of the tiny blooms by 20-30% — it makes the cloud feel natural.
Common mistakeDon’t outline the entire cloud silhouette with a thick dark line; it flattens the airiness.
13. Wild Thistle Spikes With Soft Purple Tips
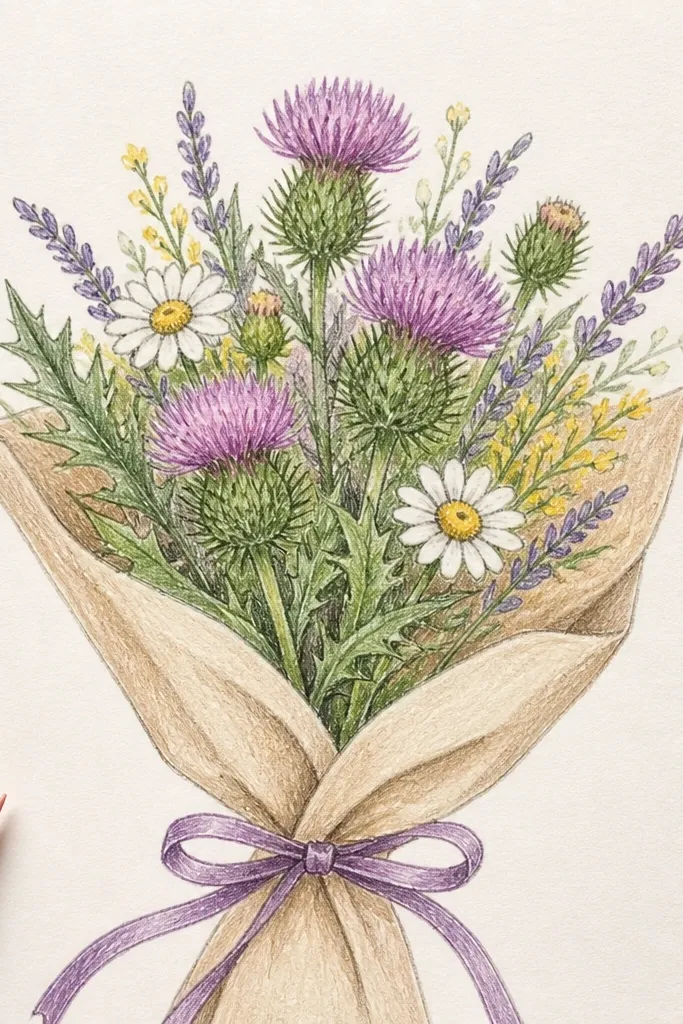
Thistle drawings look graphic and pretty when you keep the spines clean. Draw a few thistle heads as spiky balls, then add long thin leaves that cut diagonally across the bouquet. Use pale purple on the tips and a gray-green for the spines. The contrast between spiky texture and soft shading reads as dreamy, not harsh. Keep the number of thistle heads small (3-4) so the drawing doesn’t become a scratchy mess. This is a good idea if you like bold shapes but want a gentle color palette.
Step 1 — Sketch 3-4 thistle heads as circles, then add short spikes around each circle using straight lines that radiate outward. Step 2 — Draw leaves as narrow blades, angled diagonally, with a single center vein line. Step 3 — Add thin stems that connect each thistle head to the base. Step 4 — Color: gray-green for stems and spines, pale purple for the outer tips, then add a darker gray-green shadow under each head.
Good to knowColor the tips only — leave the inner spikes lighter for a softer look.
Common mistakeDon’t fill every spike with heavy color; it turns spiky into muddy.
14. Wild Orchid-Like Blooms With Curved Petals
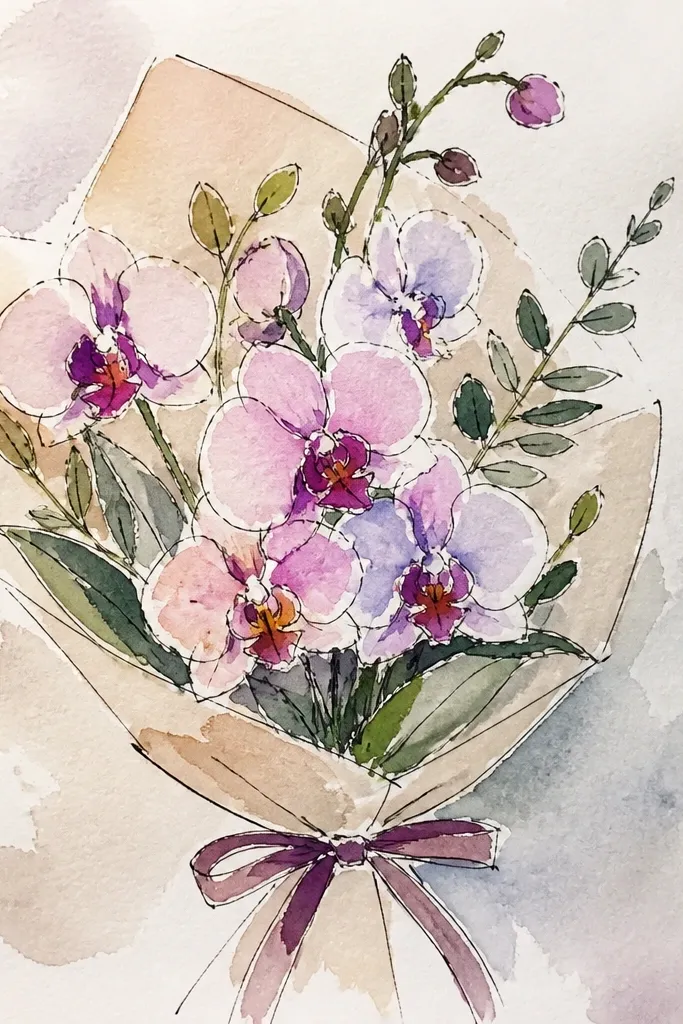
Orchid-like wild blooms look elegant without being hard. Draw 2-3 flowers with one central “lip” petal shape and two side petals that curve inward. Add small side buds at the stem tips to make the bouquet feel full. The dreamy look comes from smooth petal curves and subtle shading — keep the highlights bright and shade only the folds near the center. Use a limited palette: one main color like soft lilac or dusty pink plus a cool shadow. This is a strong pick for aesthetic seasonal drawings because the flowers look like they belong in a boutique sketchbook.
Step 1 — Draw the center lip as a rounded triangle or heart shape, then add two side petals as curved teardrops that overlap behind it. Step 2 — Add 4 small “dot” marks or tiny lines inside the center to suggest texture. Step 3 — Connect stems at the base and add 2-3 small buds as tight ovals. Step 4 — Color: light lilac on petals, darker lilac in the fold areas, and gray-blue shading under overlaps.
Good to knowMake the petals slightly thicker at the outer edge — it reads more like a real flower.
Common mistakeDon’t over-detail the center; a few marks look better than a fully shaded disk.
15. Field Daisy and Wild Grass Low Bouquet
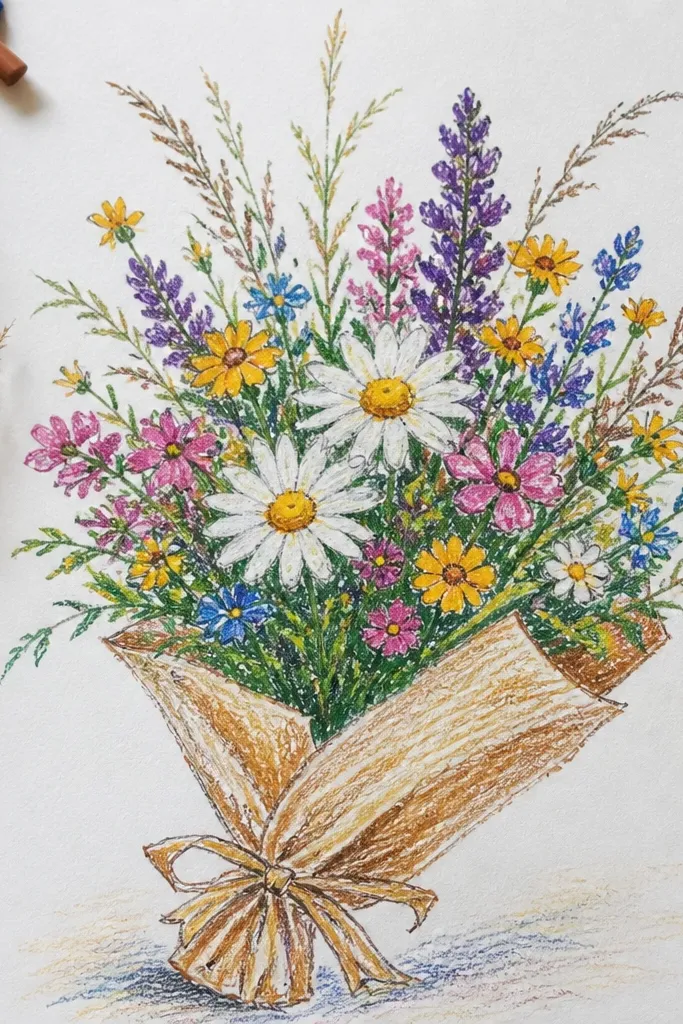
Low bouquets look good because they create a clean silhouette for photos. Use 2-3 daisies as your anchors, then let wild grass blades sweep across the bottom like a soft frame. Keep grass blades thin and varied, with some crossing in front of the stems. The dreamy effect comes from the contrast: bold daisy petals above, fine grass below. Add a few tiny buds near the base to keep it from looking empty. This is a great choice if you want a seasonal drawing that looks “styled” even with simple tools.
Step 1 — Draw a shallow base line where the bouquet starts, then place 2-3 daisy centers above it. Step 2 — Add daisy petals around each center using consistent curved lines, then connect stems down to the base. Step 3 — Draw 20-30 grass blades across the bottom — each blade is one long tapered line with one or two small side lines. Step 4 — Color grass with light gray-green and shade under daisies with gray-blue.
Cross a few grass blades in front of the daisies; it makes the drawing feel layered.
Don’t color every grass blade the same darkness; vary pressure to create depth.
16. Wild Rosebud and Thimble Leaves Bouquet
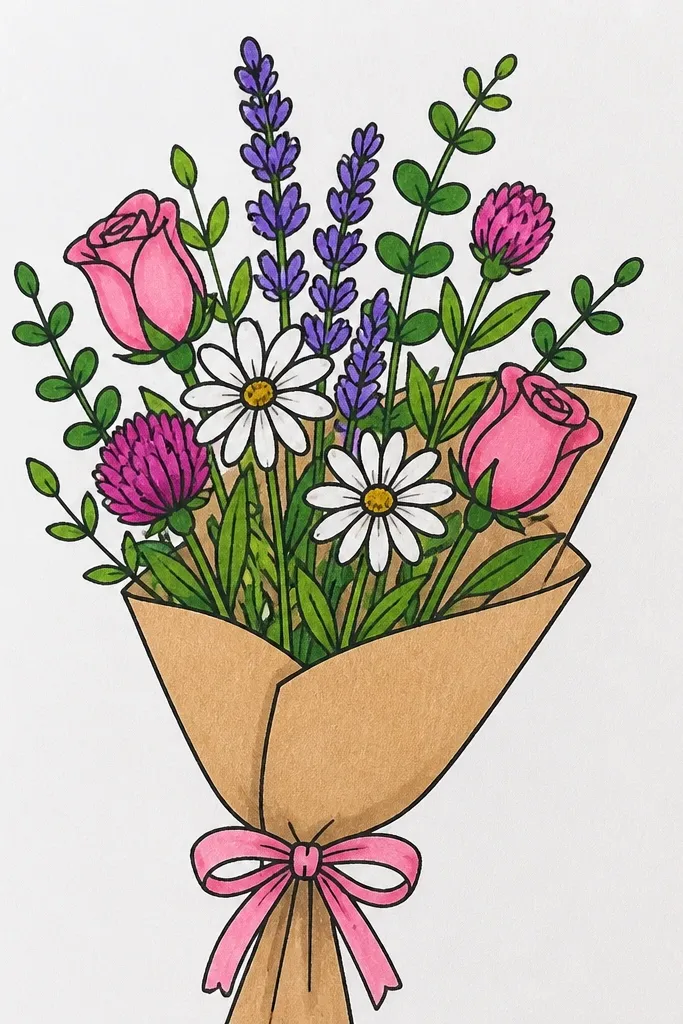
This one looks cohesive because rosebuds and round leaf shapes share a similar softness. Draw one open rosebud in the center and two tighter buds on the sides, then add small rounded leaves that look like thimbles. The leaves should sit slightly behind the buds so the bouquet has depth. Color with a gentle rose tone and a warm olive for leaves, then add a cool shadow under each bud. It’s dreamy because the forms are rounded and the shading is restrained. It’s also fast — a few buds and leaves are enough.
Step 1 — Sketch three bud shapes: one with visible outer petals and two as tighter ovals with 4-5 petal lines. Step 2 — Add 8-12 thimble leaves as small circles or rounded teardrops with a tiny notch and a center vein line. Step 3 — Draw stems that tuck behind leaves, so leaves overlap the stem line. Step 4 — Color: rosebuds in light rose with darker rose at folds, leaves in warm olive with gray-blue shadow under each leaf.
Good to knowRound leaves look best when you keep their outlines thin and consistent.
Common mistakeAvoid long pointed leaves here; it breaks the soft silhouette.
17. Daisy Chain Bouquet With Ribbon Stems
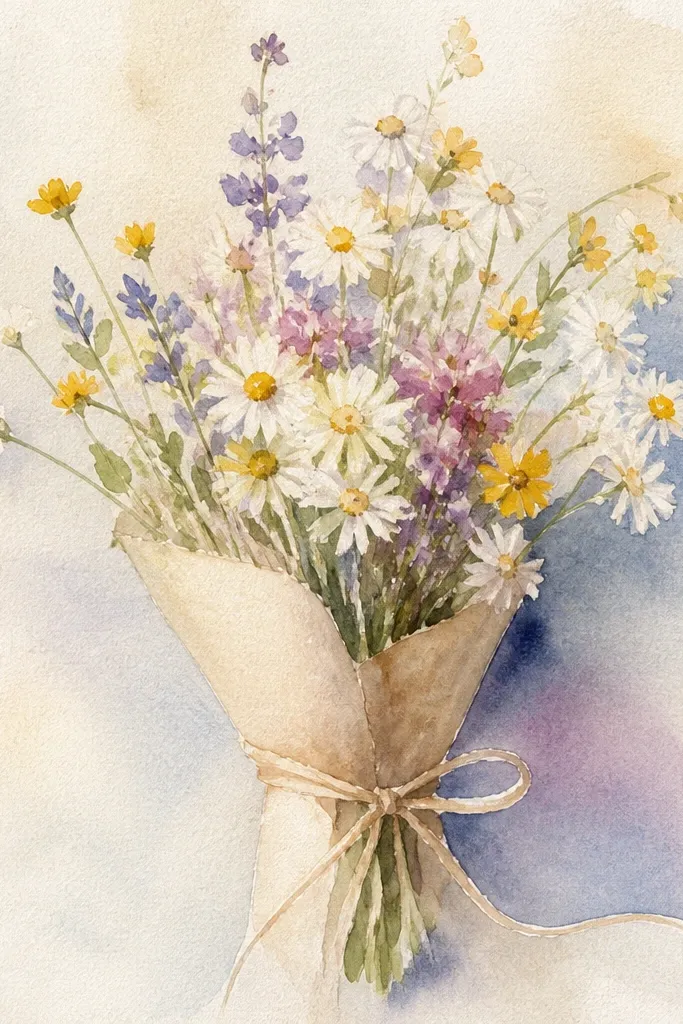
Think of this as daisies growing along a ribbon. Draw a winding stem line that loops across the page, then place daisies at intervals like beads. This creates movement and makes the bouquet look intentional even if the flowers are simple. The dreamy part is the ribbon-stem shading: use a light gray-blue under the stem so it looks dimensional. Add a few tiny leaves tucked between daisies. This is a fun “budget wow” idea because it looks graphic and cute in photos.
Step 1 — Draw a ribbon-like line across the page with 2-3 loops, then mark daisy positions along it. Step 2 — Draw each daisy with 10-14 petals and a small yellow center ring. Step 3 — Add tiny leaves as small teardrops between some daisies, only on one side of the ribbon. Step 4 — Color: light yellow centers, pale petals, and gray-blue shading under the ribbon stem where it curves.
Good to knowMake the ribbon stem thicker where it curves toward the viewer and thinner where it goes behind.
Common mistakeDon’t put leaves everywhere; a few tucked leaves keep it airy.
18. Wild Camellia Bloom With Soft Center Swirl
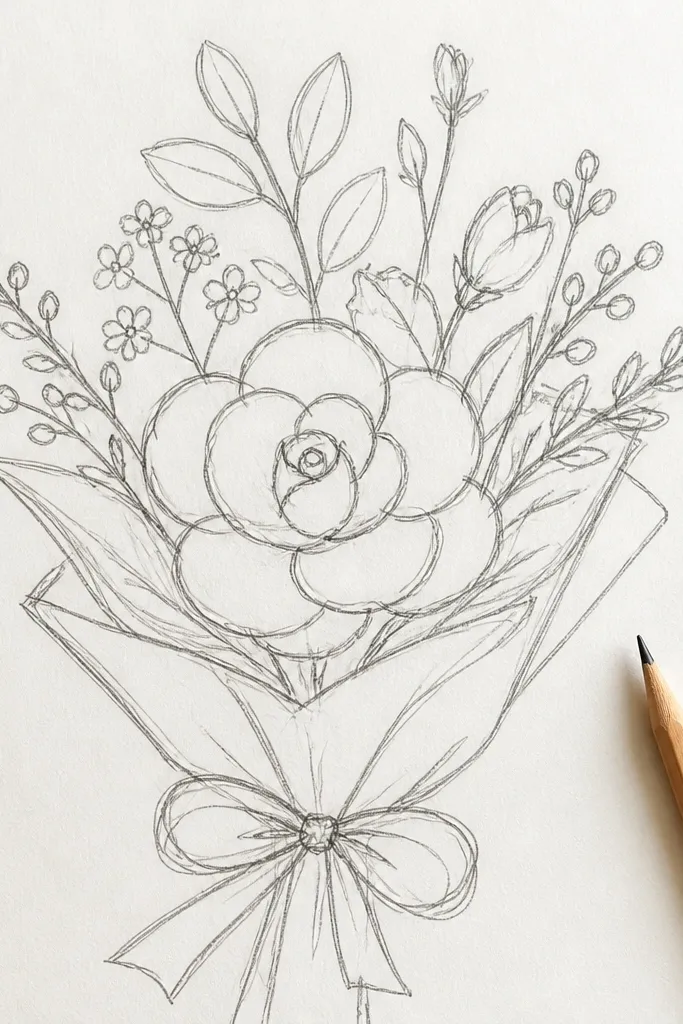
Camellia-style blooms read dreamy because of the spiral petal layering. Draw one main camellia in the center with many layered petals that overlap like a spiral shell. Then place 1-2 small filler buds at the edges so the bouquet doesn’t feel empty. The look is controlled and pretty: you get complexity from layering without needing a botanist level of detail. Use a limited color range — blush or soft red petals plus a cool shadow — and keep highlights light. This idea looks gorgeous for seasonal posts because it feels romantic but still clean.
Step 1 — Sketch a spiral center, then build outer petals in rings that follow the spiral direction. Step 2 — Add 1-2 small side buds as tight ovals with 4 petal lines each. Step 3 — Draw a few leaves behind the bloom base, keeping them small and simple. Step 4 — Color in layers: light blush on the outer petals, darker blush in the overlap folds, and gray-blue shadows under the lower petal layers.
Good to knowUse lighter pencil pressure in the center so the swirl looks soft, not harsh.
Common mistakeDon’t fully outline every petal; let some edges fade into the overlap.
19. Wild Flower Bouquet With Watercolor-Look Pencil Wash
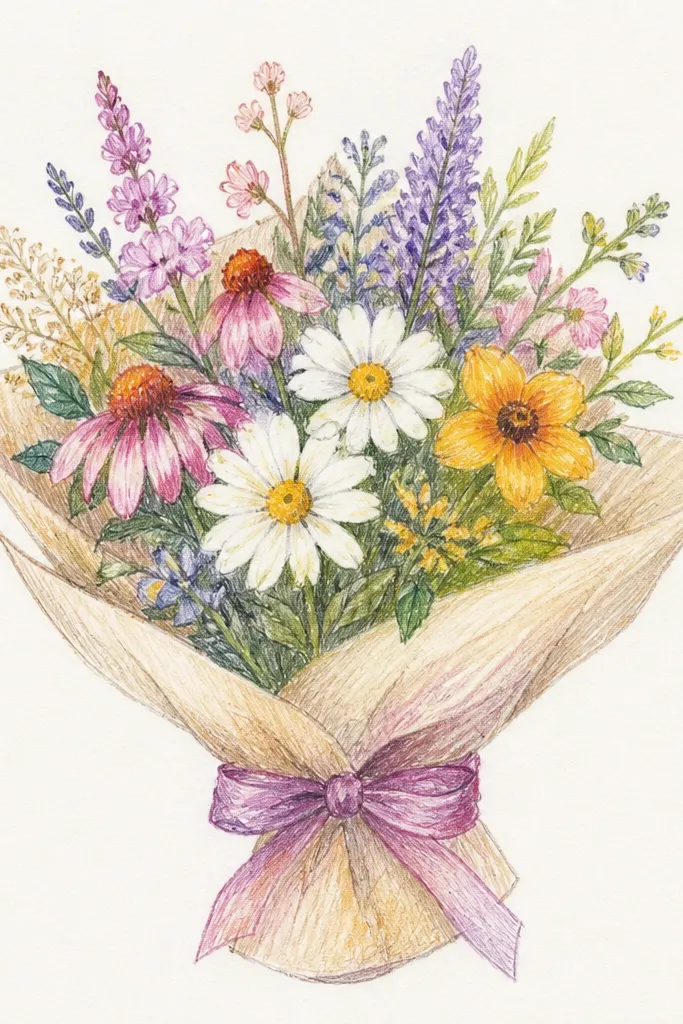
This idea is for the “I want it to look like watercolor but I don’t have watercolor” crowd. You draw the bouquet with pencil + fine liner, then create watercolor-like softness by blending colored pencil with a damp brush or blending tool (on paper that can handle it). The dreamy look comes from smooth gradients on petals and gentle bleed-like edges. Keep it simple: 3 main flowers, 2 fillers, and a few leaves. The result looks expensive in photos because the petals have that painted softness rather than flat coloring.
Step 1 — Draw your bouquet lightly in pencil, ink the main outlines, and erase pencil marks under the ink. Step 2 — Color petals with colored pencil using light layers, then blend with a damp brush in small sections until the color softens. Step 3 — Add shadows with slightly darker pencil before blending so the darker value stays in the fold areas. Step 4 — Let it dry fully, then add a few crisp ink line touch-ups only where petals overlap.
Test on scrap first so you don’t lift the paper — hot-press watercolor paper behaves best.
Don’t flood the page; too much water turns petals into stains.
20. Mini Wild Bouquet In a Hand-Drawn Vase Frame
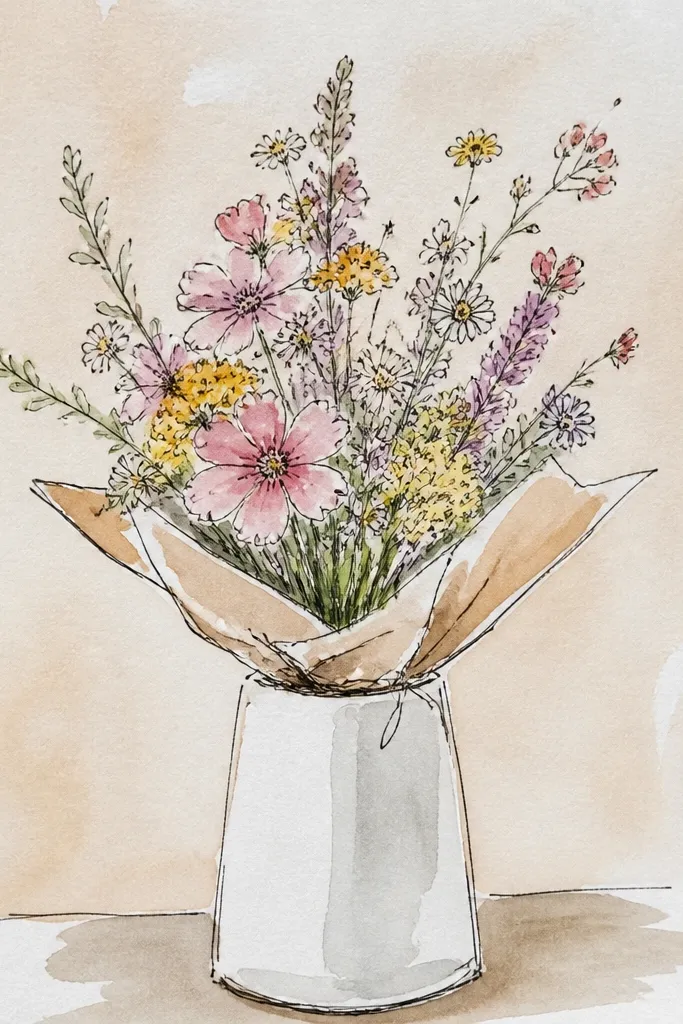
A vase frame makes your sketch look finished even if the bouquet is simple. Draw a minimal vase outline in the lower third, then place 5-7 wild flowers rising out of it with stems that look like they belong in water. Keep the flowers varied — one daisy, one lavender-like sprig, and a couple tiny buds — so the bouquet reads as wild but cohesive. The dreamy look comes from negative space inside the vase and light shading behind stems. This is a strong choice for seasonal & holiday posts because it feels like a gift-ready illustration. It also helps composition, which is the fastest way to make a sketch look good.
Step 1 — Sketch a simple vase shape: wider at the belly, narrower at the top, with a thin rim line. Step 2 — Draw stems rising from inside the vase, then place 5-7 flower heads on top using different petal shapes. Step 3 — Add a light water line inside the vase and shade just beneath the stems. Step 4 — Color: light petals, soft green-gray leaves, and gray-blue shadows behind stems for depth.
Good to knowKeep the vase outline thin and let flowers overlap it; that makes the whole drawing feel layered.
Common mistakeAvoid a heavy vase fill; the focus should stay on the bouquet.