
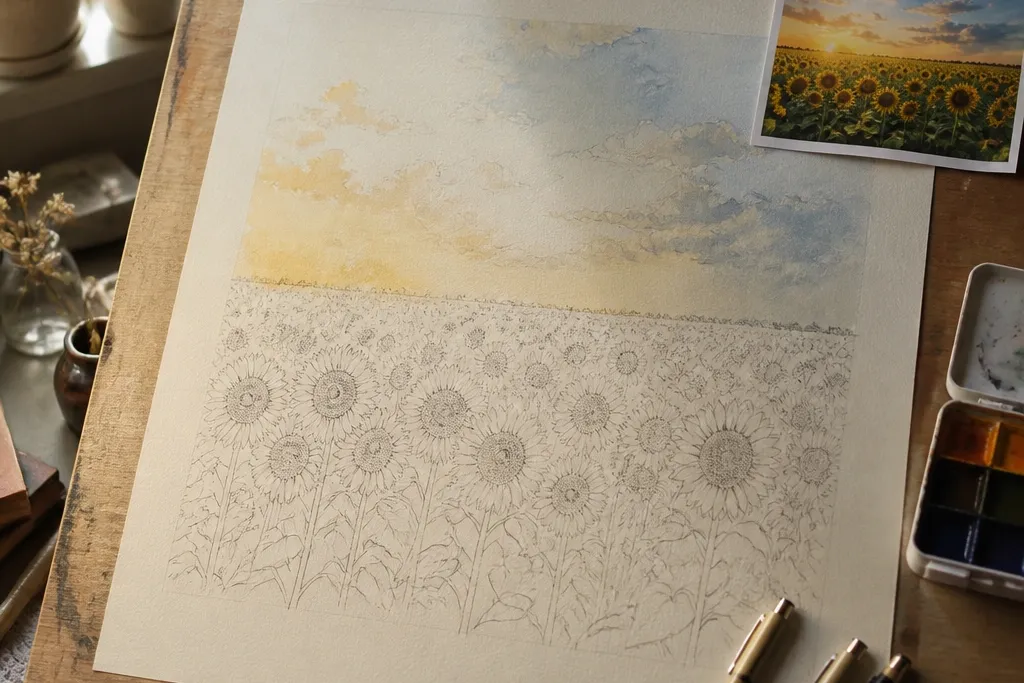
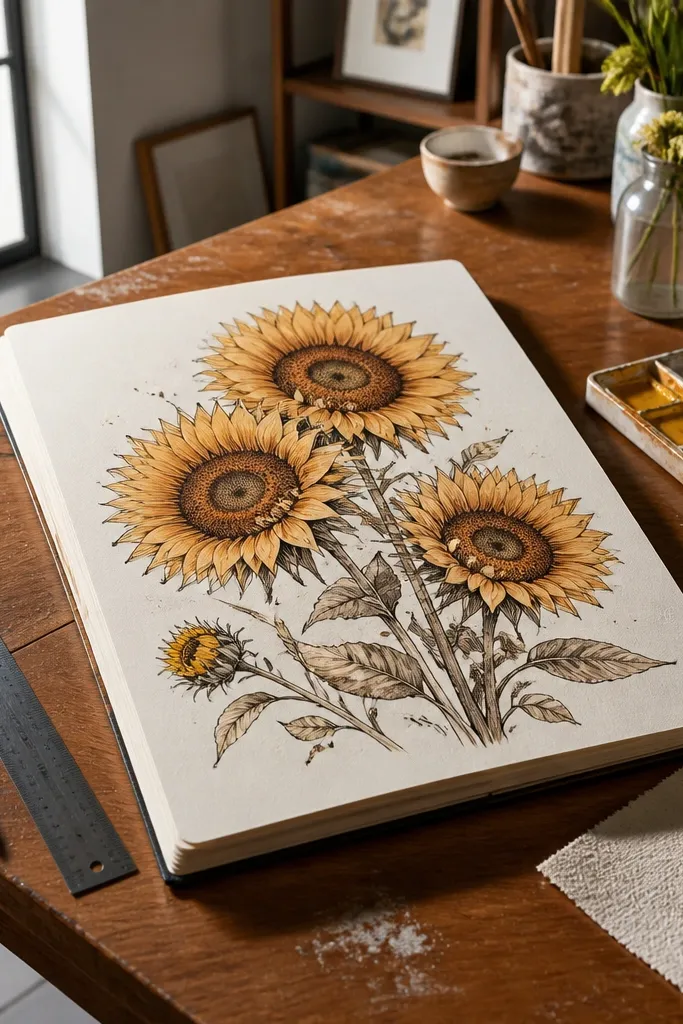
1. Sunrise row with one tall hero sunflower
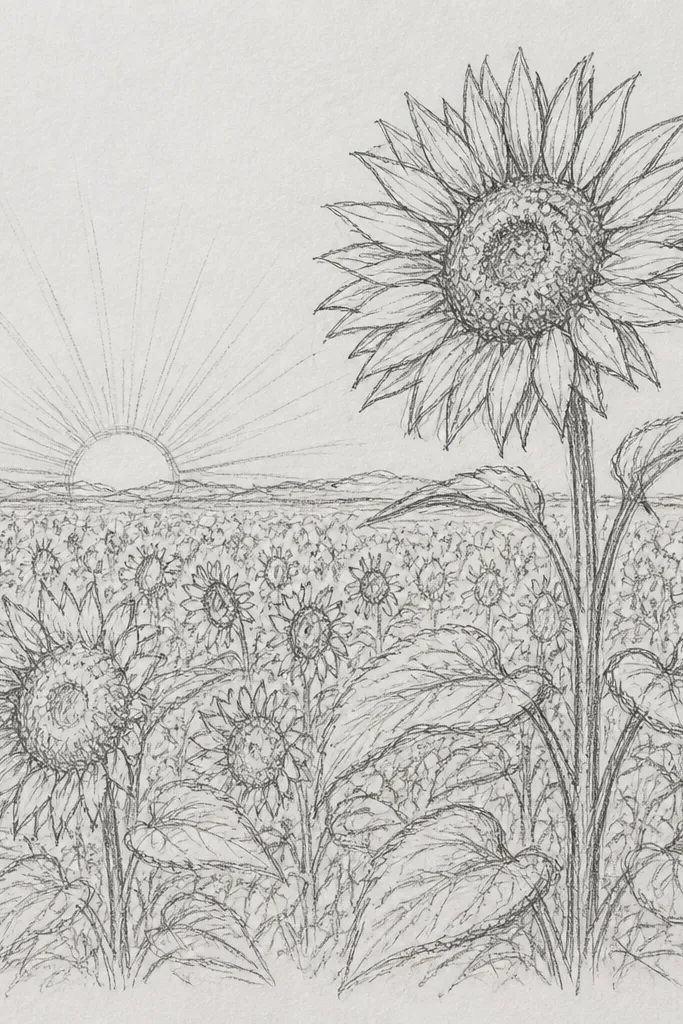
This layout looks dreamy because it gives your eye a single focal point and then repeats the scene in softer layers. Put one tall sunflower slightly off-center so it feels natural, then build a row behind it that gets lighter and shorter. Keep the sunrise sky warm and hazy, with the horizon line barely sketched. The petals should have a gentle gradient — darker at the base, lighter at the tips — so the whole field looks sunlit instead of flat.
Step 1: Draw a faint horizon line and sketch one oversized sunflower first, using a dark stem and a medium-thick outline on petals. Step 2: Add 6-10 smaller sunflowers in a row behind it, spacing them so stems overlap lightly; shade the distance blooms with lighter pencil pressure. Step 3: Build a sunrise sky with a warm yellow-to-peach gradient, then add soft shadow under petals using a cool gray-blue pencil.
Use a kneaded eraser to lift highlights on petals after you shade the shadows.
Don’t outline every bloom with the same darkness — the distance needs to fade or it won’t look like a field.
2. Cloudy midday field with foggy distance
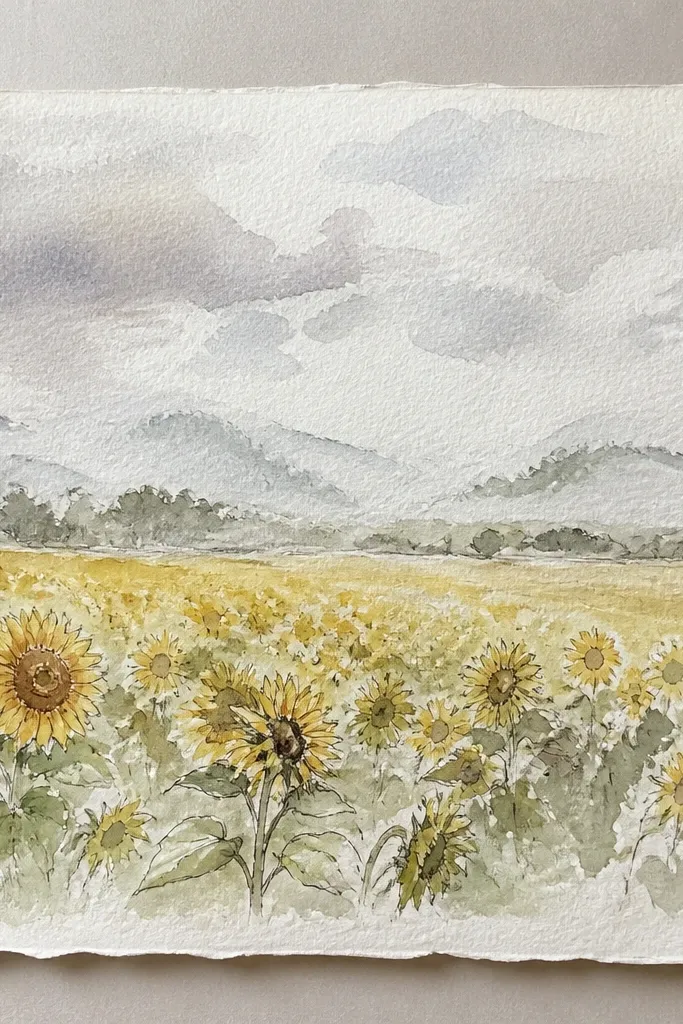
Overcast scenes feel aesthetic because the contrast is lower and the field looks soft. This version uses foggy distance to create depth: foreground petals and centers are darker, while background blooms become pale outlines and minimal detail. Draw the sky with cloudy patches so the whole page doesn’t look like one flat blue wash. The trick is to keep the leaves less defined in the back — fewer veins, lighter shading — so the field breathes.
Good to knowBlend sky clouds first, then draw leaves on top so edges stay clean.
Step 1: Sketch a horizon and draw 3 foreground sunflowers with clear centers, then add 8-12 background blooms as light outlines only. Step 2: Shade clouds using a dry-brush technique with a gray-blue pencil, then blend gently with a paper stump. Step 3: Add fog by erasing and softening the boundary where the horizon meets the field, then lightly haze the stems with a translucent pencil layer.
Common mistakeSkip heavy black outlines in the back — fog needs soft edges, not crisp contours.
3. Golden hour diagonal path of stems
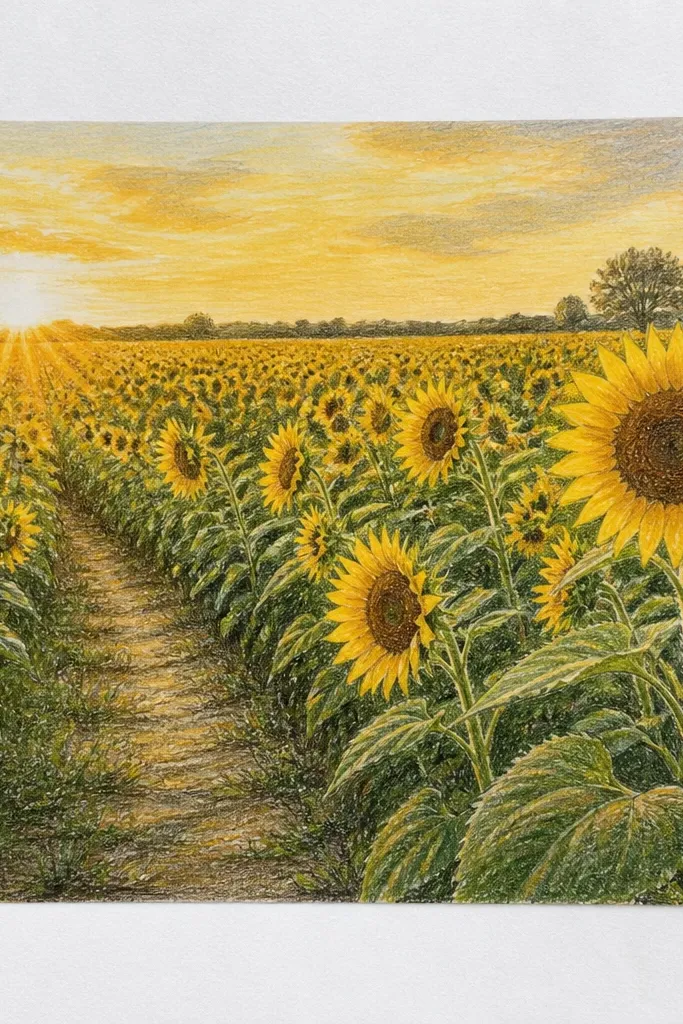
A diagonal path is the fastest way to make a sunflower field look like it has movement. Place the densest cluster at the bottom corner and let stems sweep toward the horizon, like a trail through the field. Use warm golden hour color in the sky and add long, soft shadows from stems across the leaves. The aesthetic comes from rhythm: alternating big and small blooms along the diagonal, with overlapping heads creating a layered look.
Good to knowKeep stem lines slightly curved. Straight stems look like a pattern, not a field.
Step 1: Mark two anchor points — one near the bottom corner and one at the horizon — then draw a diagonal line that becomes your stem direction. Step 2: Plant sunflowers along that line in decreasing size: 3 big heads in front, 6 medium midground, 10 small background. Step 3: Shade petals with warm yellow and add cool shadows under each head using gray-blue; finish by lightly scribbling shadow direction across leaves.
Common mistakeDon’t space blooms evenly. Uneven spacing is what makes the diagonal path feel natural.
4. Vintage sepia field with inked outlines
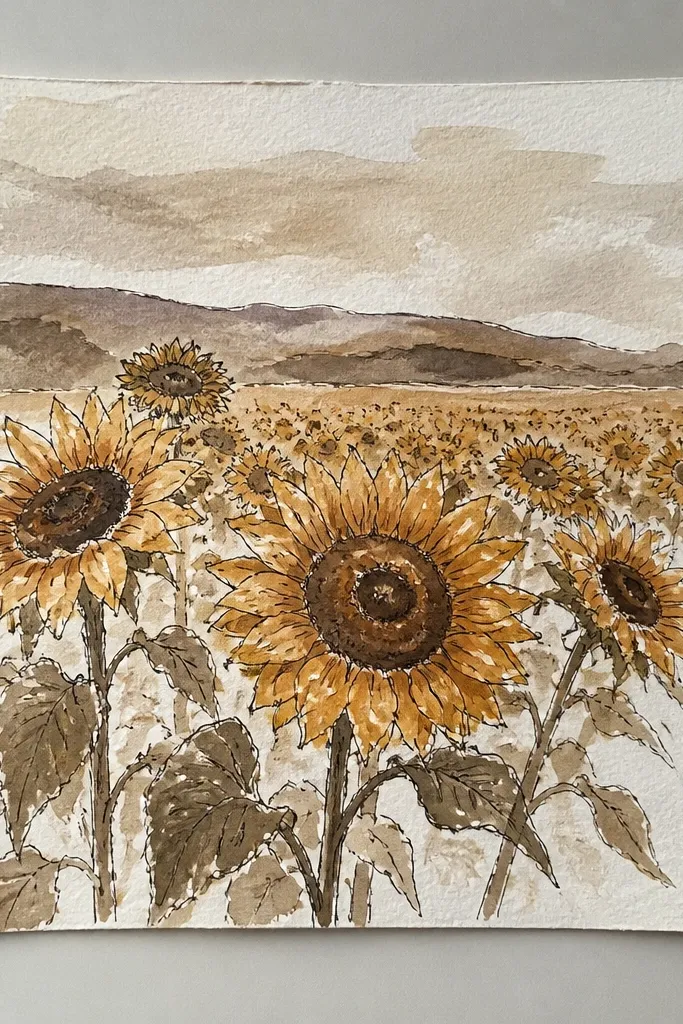
Sepia instantly makes drawings look like old paper art, and inked outlines give structure without needing heavy color. This idea is great if you want a clean, aesthetic look without getting lost in coloring. Draw petals with a lighter sepia wash, then add ink lines only where you want emphasis: center rings, petal edges, and the darkest stems. The field becomes photogenic because the contrast is controlled and the paper tone unifies everything.
Good to knowUse a fine liner for centers so the ring detail stays crisp after the wash dries.
Step 1: Tone your paper with a light sepia wash using diluted brown ink or watercolor; let it dry fully. Step 2: Ink the centers first with a tight circle pattern, then outline petal edges selectively instead of the whole flower. Step 3: Add leaf clusters with short ink strokes, then deepen a few stems in the foreground for depth.
Common mistakeDon’t ink every petal edge. It turns vintage into clutter fast.
5. Pastel watercolor sky with crisp pencil sunflowers
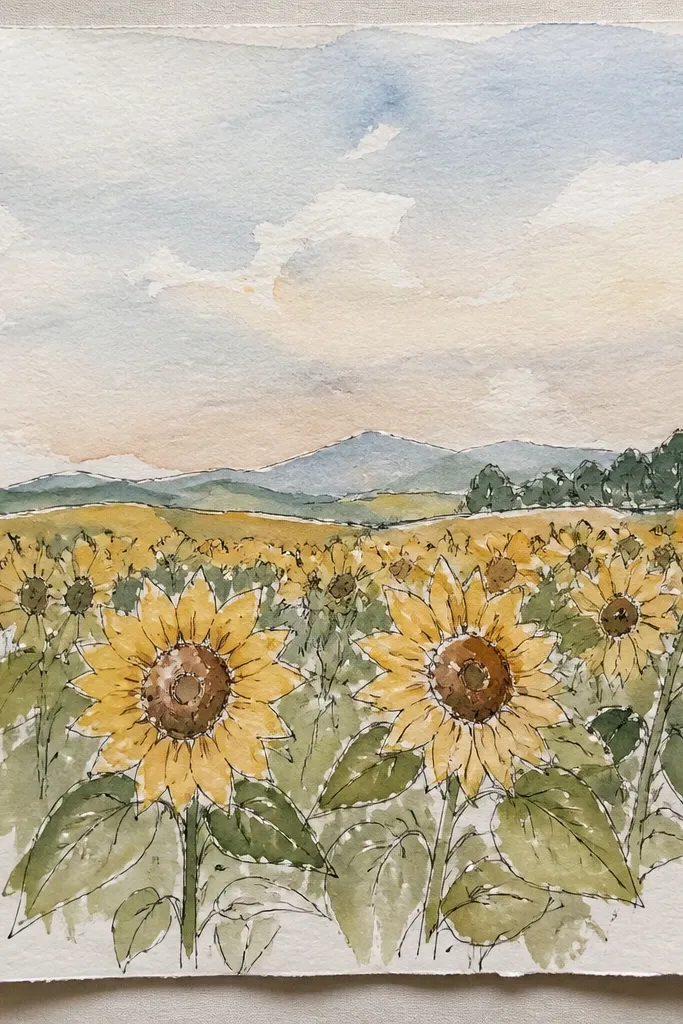
This combo looks dreamy because watercolor handles the mood while pencil keeps the flower shapes accurate. Let the sky be soft and blotchy with pastel washes, then draw sunflowers with clean pencil lines and gentle shading. Keep centers slightly darker than petals so the flowers read clearly against the airy background. The key is leaving paper texture visible in the sky — it makes the scene look like it’s glowing.
Good to knowTape your paper edges before watercolor so you get a clean border for a finished look.
Step 1: Wet the sky area lightly with water and add pastel washes (peach, pale lavender, baby blue), then drop in darker spots near the horizon. Step 2: After the sky dries, sketch sunflowers in pencil with darker outlines for foreground and lighter lines for background. Step 3: Shade petals with a warm yellow pencil and add cool shadow beneath each head, keeping shading light so the pencil doesn’t look muddy.
Common mistakeDon’t color the whole page with pencil before the sky dries. You’ll smear the watercolor.
6. Ink and white gel highlights on kraft paper
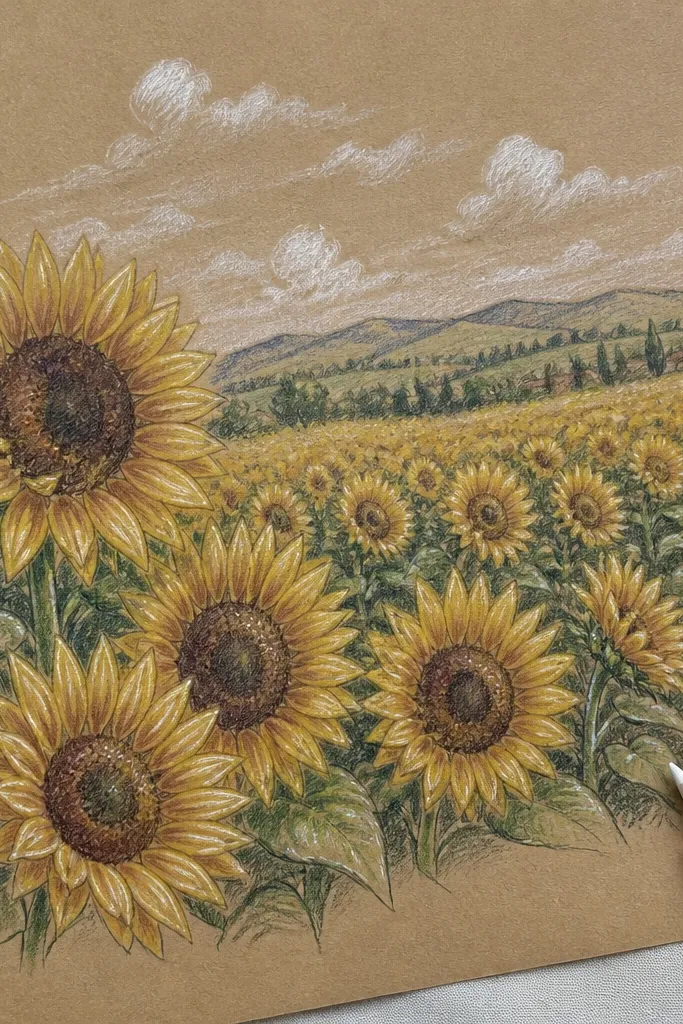
Kraft paper makes sunflower drawings feel warm and grounded, and white gel highlights make petals pop instantly. Use ink to define the shapes, then rely on the paper’s brown tone for mid-values so you don’t need heavy coloring. The centers look especially photogenic with tight ink stippling and a few bright white highlight dots. This is a great choice when you want an aesthetic sunflower drawing that looks finished even with minimal color.
Step 1: Sketch sunflower silhouettes lightly, then ink the centers with stipple dots and the petals with curved line segments. Step 2: Add leaves and stems using short ink strokes, keeping background blooms lighter by using fewer lines. Step 3: Use a white gel pen to add petal vein highlights and a few specular dots on the center ring.
Let ink dry between layers. Gel pen over wet ink turns gray.
Don’t overfill the page with white. A few targeted highlights look intentional.
7. Monochrome charcoal field with soft edges
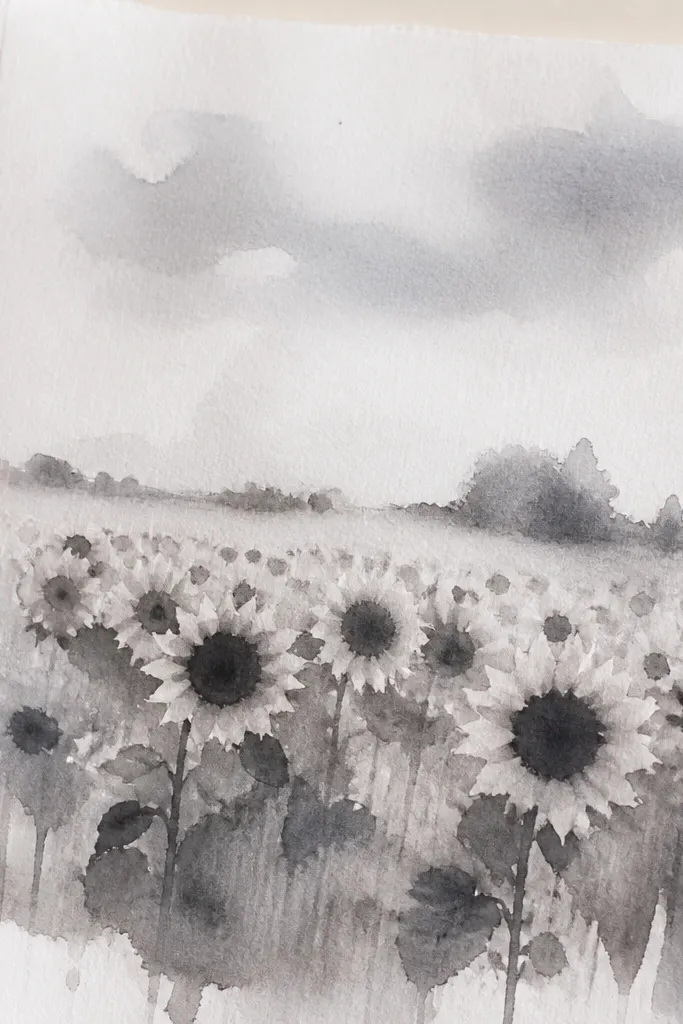
Charcoal gives a dreamy, smoky feel without color at all. This version works because it uses value instead of color: dark centers and stems in front, then a fading, smoky wash toward the horizon. Draw petals as curved charcoal strokes with a lighter pressure so you get a gradient edge. The overall look is photogenic because it has strong contrast where it matters and soft blur where it should.
Good to knowUse a fixative spray before you add highlights with a white pencil so you don’t smear.
Step 1: Lightly block the horizon and sketch 3-5 foreground sunflowers with dark circular centers and firm stem lines. Step 2: Add midground blooms with lighter charcoal and fewer petal strokes; blend with a paper stump so edges soften. Step 3: For the sky, leave the paper mostly alone or add a light charcoal haze that fades upward.
Common mistakeDon’t press hard everywhere. Charcoal only looks dreamy when the light areas stay light.
8. Sunflowers in a framed window view
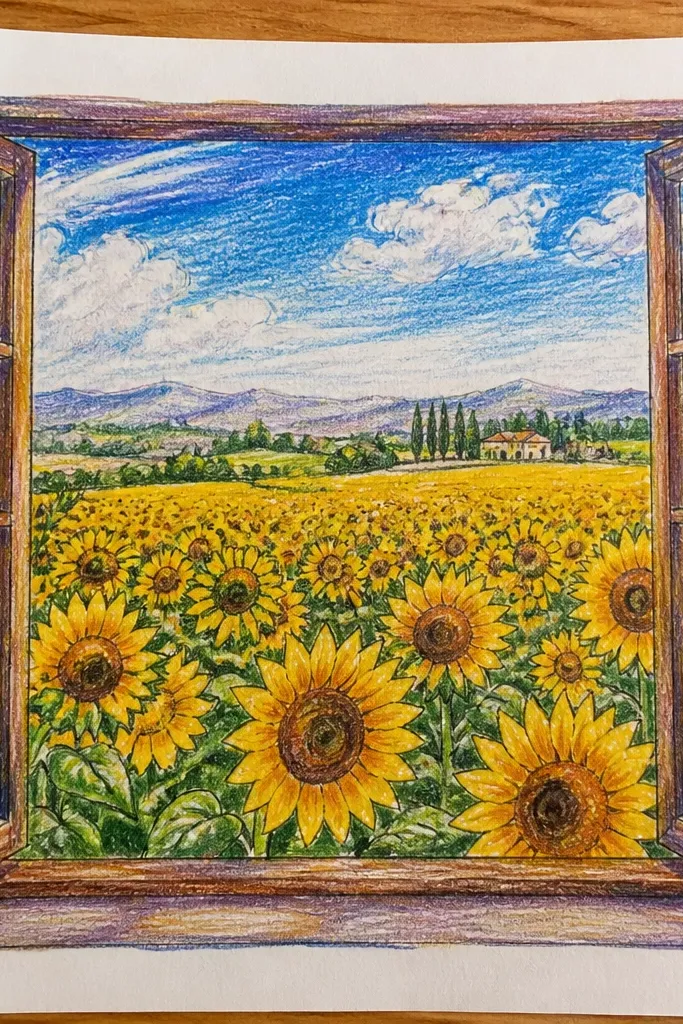
A frame makes your sunflower drawing feel like a scene, not just objects on paper. Draw a window-like rectangle (rounded corners look cozy), then place the field inside with a clear foreground edge and a softer background fade. The best part is the layering: let a few stems touch the frame so it feels immersive. Keep the sky simple inside the window so the sunflowers read as the main subject.
Step 1: Draw a rectangle border with a light pencil and add a slight perspective tilt so it feels like a view. Step 2: Place 2 foreground sunflowers crossing the bottom edge of the window, then add 8-12 smaller heads behind with lighter outlines. Step 3: Shade the sky inside with a gentle gradient and use a cool pencil for shadows so the petals separate from the background.
Add one shadow under the window border for a clean, gallery feel.
Don’t overcrowd the top sky area. Leave breathing room above the horizon.
9. Oversized center bloom with petal fan explosion
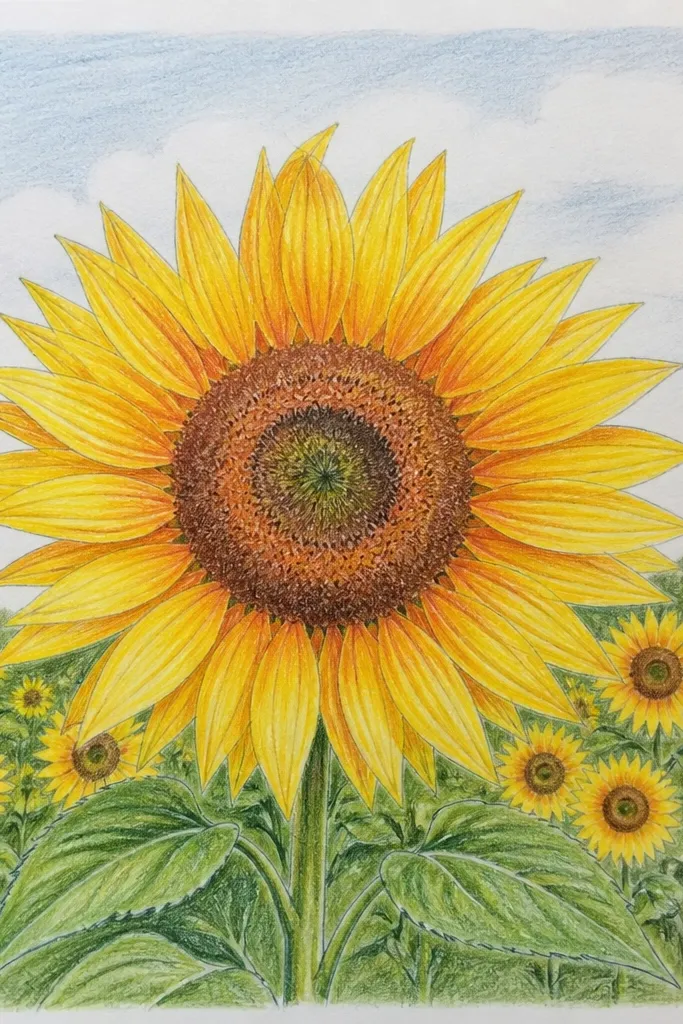
This one is aesthetic because it breaks the usual whole-field formula and makes the viewer feel close to the flower. Start with a giant sunflower head that fills the page, then let smaller blooms peek from behind like a field still exists. The center ring should be detailed enough to feel real, but keep it clean — you’re aiming for “drawn charm,” not hyper-realism. Use a fan-like petal arrangement so the petals look like motion radiating from the center.
Good to knowDraw petals with light, repeatable curves. It keeps the fan symmetrical without looking stiff.
Step 1: Draw a large circle for the center and sketch petal shapes radiating outward, leaving slight gaps for highlights. Step 2: Add 3-6 background sunflowers as smaller, partially hidden silhouettes behind the big one. Step 3: Color the petals with warm yellow and add shadow lines at petal bases; then stipple the center ring and add a few white gel highlights on the brightest petal edges.
Common mistakeDon’t make the big center too dark. If the center is black, everything else loses contrast.
10. Field at dusk with purple-blue sky gradient
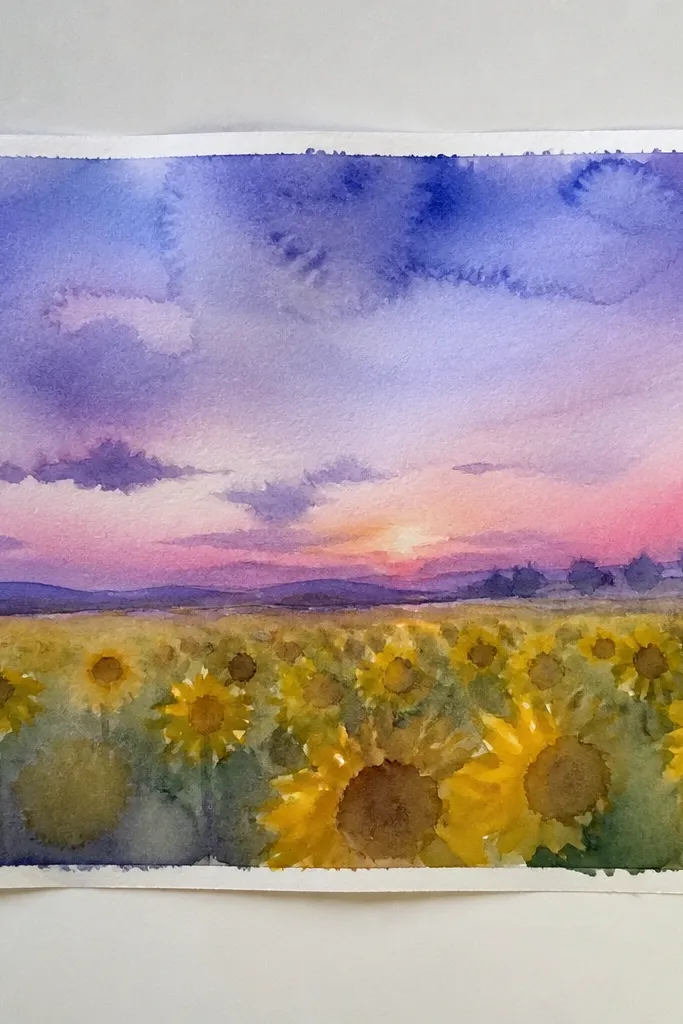
Dusk scenes look dreamy because the sky color does half the work. Pair warm yellow petals with a purple-blue gradient so the shadows feel cinematic. Keep the horizon slightly misty and reduce detail in the far field — fewer leaf marks, lighter stems. This is also a great aesthetic sunflower drawing for upcycling because the strong color contrast makes it pop even after you cut it into shapes.
Good to knowUse a cool shadow pencil before you add any extra color. It prevents muddy petals.
Step 1: Sketch the horizon and place 4-7 foreground blooms with dark stems and clearly defined centers. Step 2: Paint or blend a purple-blue sky gradient, darker at the top and lighter near the horizon, then add a thin mist band by blending and softening the pencil line. Step 3: Shade petals with yellow plus a tiny touch of orange near the center, then shadow with cool violet-gray to keep the dusk mood consistent.
Common mistakeAvoid bright red-brown shadows. They fight the purple sky and look harsh.
11. Wind-blown stems with curved motion lines
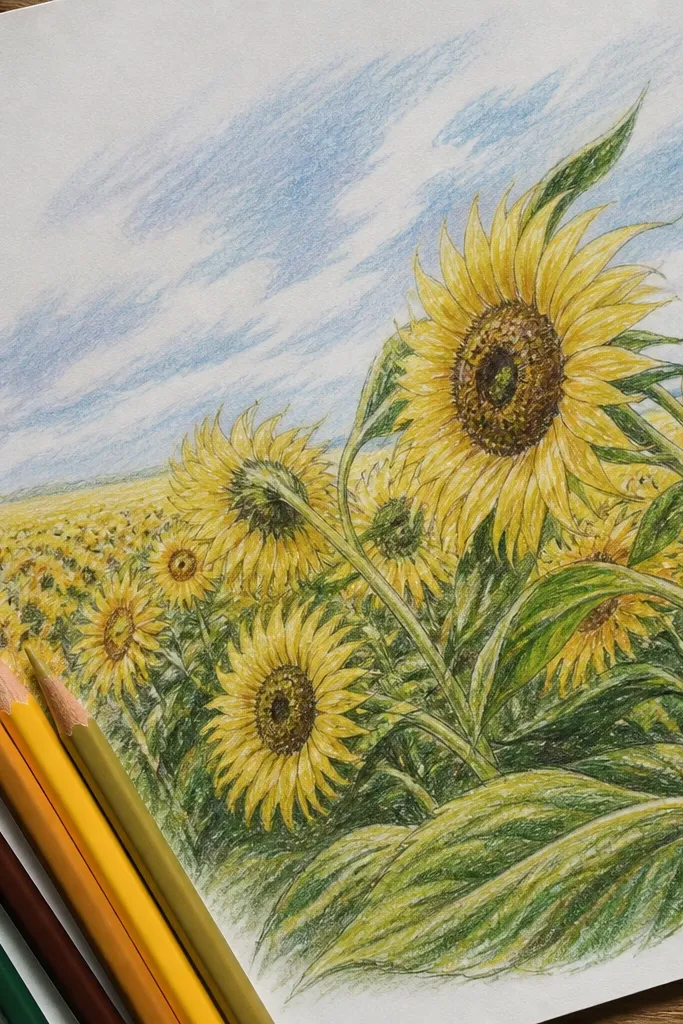
Wind makes a sunflower field feel alive, and you can show it with curved stems and gentle leaf tilt. This layout uses a “sway line” — a soft curve that guides the direction of every stem. Add a few motion marks in the leaves so the field looks in motion without turning into scribbles. The petals should still be distinct, but their edges can soften slightly to match the wind.
Step 1: Draw a curved center guideline from bottom left to right, then sketch stems leaning along that curve. Step 2: Place more blooms toward the foreground where the tilt is stronger, and reduce the tilt in the back for depth. Step 3: Shade petals with light yellow and add shadows on the windward side using a cool gray-blue pencil; finish with a few thin curved line accents in leaf clusters.
Keep the sway direction consistent. Mixed wind directions read as mistakes.
Don’t draw every leaf at the same angle. Variation is what makes wind look natural.
12. Two-tone leaf clusters with teal shadow wash
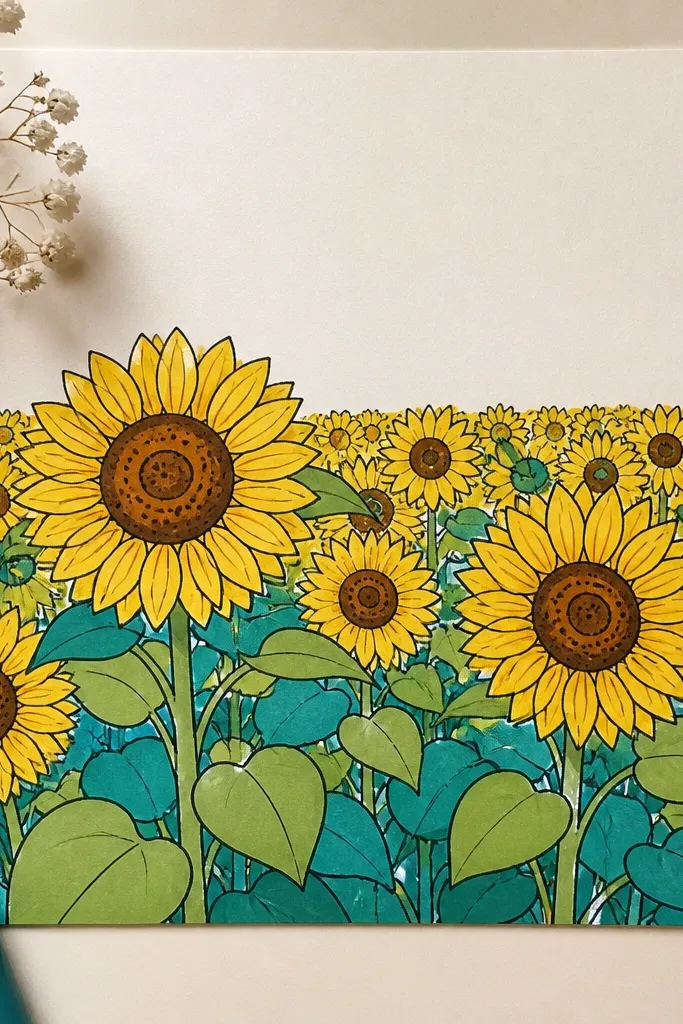
Two-tone leaves look polished because the viewer can separate light and shadow instantly. Use one green for midtones and a muted teal for shadows, then keep stems darker in front. The sunflowers stay crisp, while the leaf field becomes a soft, aesthetic pattern. This is especially good if your drawings look “flat green” — teal shadows fix that fast.
Step 1: Sketch your field with simple stem lines and place 5-8 sunflower heads in front and 10-14 behind. Step 2: Color leaves in two passes: one base green layer for all leaves, then a teal wash or pencil layer only in shadow areas under each head and along stem overlaps. Step 3: Add leaf cluster texture with short strokes, then deepen only the foreground stems so the distance fades.
Use a lighter green than you think for midtones. Teal shadows need contrast, not competition.
Don’t paint teal everywhere. Shadow teal should hug stems and underside edges.
13. Sunflowers on a rolling hill with layered silhouettes
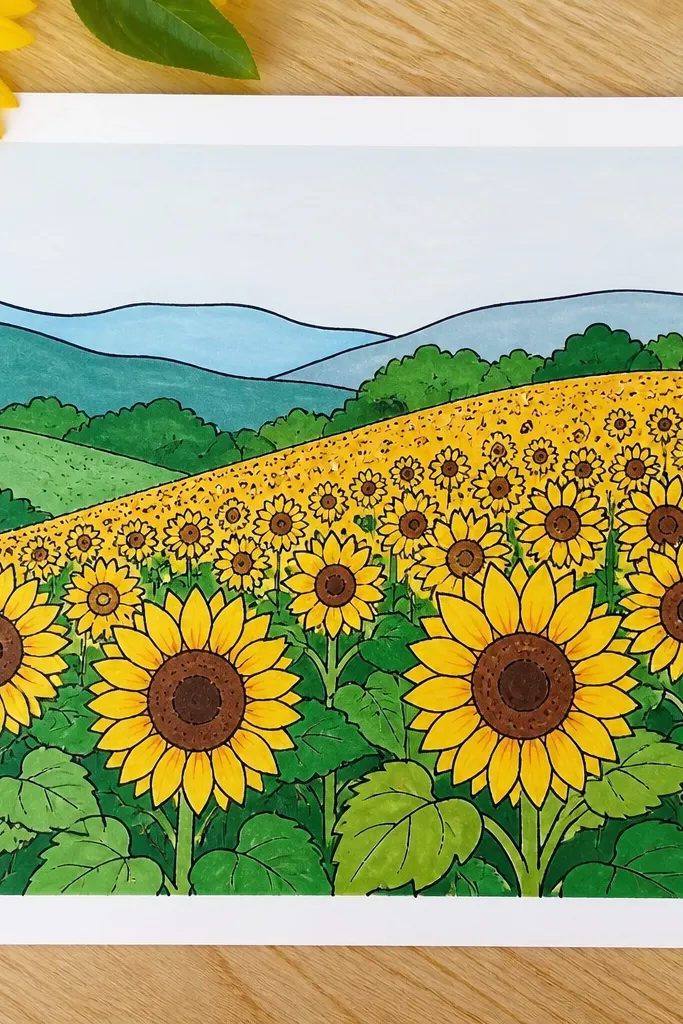
Layered hill silhouettes create depth without complicated perspective rules. Draw one rolling hill in the foreground with darker stems, then a second hill behind with lighter, softer blooms. The sky can be simple — a pale gradient — because the hills provide structure. This layout is photogenic because the silhouettes overlap like paper cutouts, giving the field a dreamy, stacked look.
Good to knowOutline the hill shape more clearly than the flowers. It keeps the horizon readable.
Step 1: Block two rolling hill lines: one near the bottom third and one mid-page, then sketch sunflowers perched on each hill. Step 2: Keep the foreground blooms more detailed (petal edges and center ring), while the second hill blooms use fewer lines and lighter shading. Step 3: Add a soft horizon haze by blending a light gray-blue pencil where hills meet the sky.
Common mistakeDon’t put the hills at the same height. If they overlap too much, depth disappears.
14. Sunflower field with patterned fabric-like petals
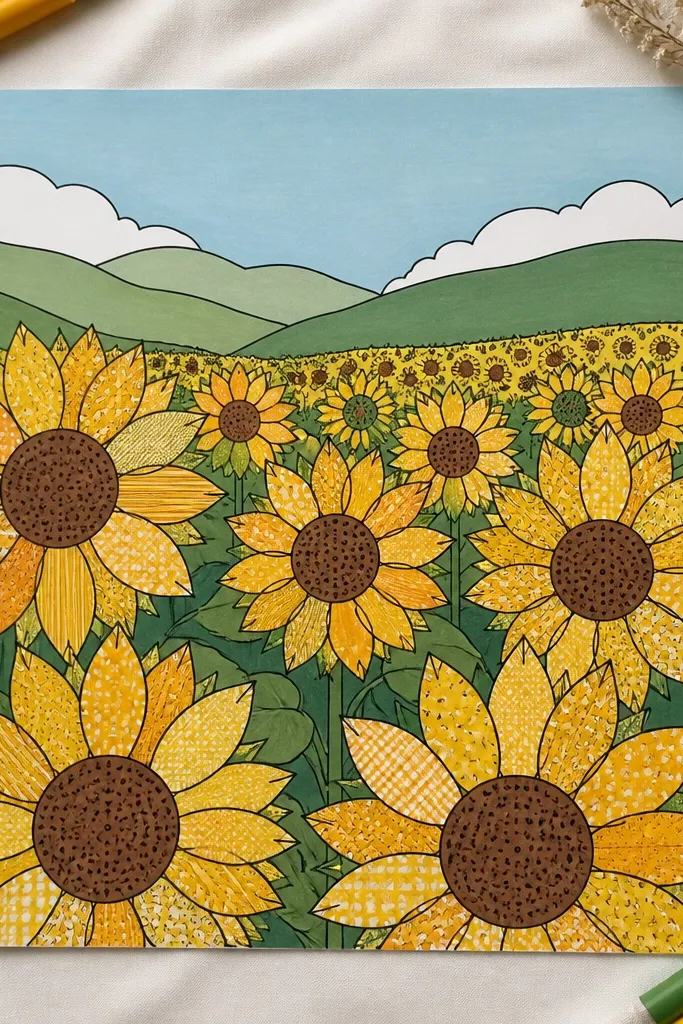
A petal pattern makes the drawing feel handmade and aesthetic, especially if you keep it subtle. Use small repeating shapes — tiny teardrops, short scallops, or thin zigzags — on petals so the field looks like it has texture even from far away. Keep the background simpler so the patterned petals stay the star. The result looks great in photos because it catches light and gives the eye something to read.
Good to knowUse a 0.3 or 0.5 fineliner for the petal pattern so it stays crisp.
Step 1: Draw 3 foreground sunflowers with clean outlines and a detailed center ring. Step 2: Instead of plain shading, add a repeating petal pattern on each flower: tiny scallop edges or micro zigzags near the petal tip. Step 3: Keep midground and background blooms mostly plain, using the pattern only on a few petals so it doesn’t turn busy.
Common mistakeDon’t pattern every petal in the entire field. Save the pattern for the foreground.
15. Minimal line-art field with watercolor smudges
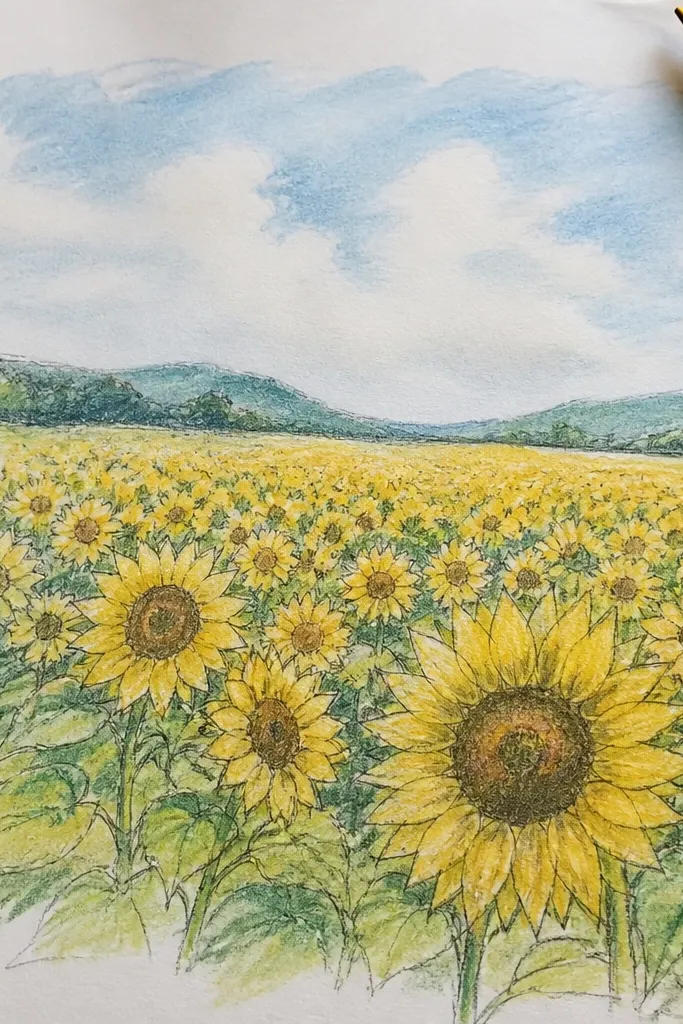
Minimal line-art looks aesthetic when the color is used as atmosphere, not full coloring. Keep sunflower petals as light pencil outlines with only a few shadow marks, then add watercolor smudges in the sky and around the horizon. This makes the drawing feel airy and modern. It also works fast, which is useful when you’re upcycling packaging paper and want a clean, quick result.
Good to knowUse a light pencil for outlines, then darken only the centers and a few foreground stems.
Step 1: Sketch a field of sunflowers with thin lines only, leaving most petals unfilled. Step 2: Add watercolor smudges behind and above the horizon in pale yellow, light gray-blue, and a touch of peach. Step 3: Add just enough center detail — a dotted ring and a darker center — so the flowers read clearly even without full shading.
Common mistakeDon’t overfill with color. If you paint petals fully, you lose the minimal airy look.
16. Sunflowers with hanging seed heads and layered blur
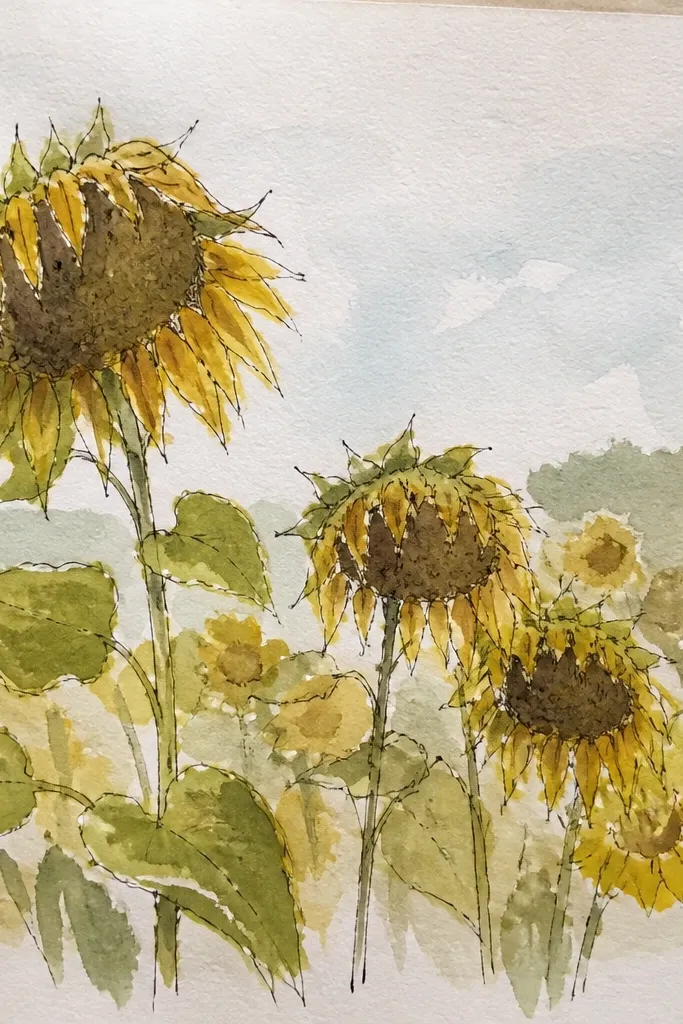
Adding seed heads that hang slightly lowers the scene and makes it feel like late-season field life. Layering blur is what makes it dreamy: foreground seed heads are sharp, midground is softer, and far blooms are just shapes. Use a mix of line detail and smudged shading so the field feels atmospheric. This look is photogenic because the seed heads create a different silhouette than full petals.
Good to knowVary seed head angles. A little tilt makes it feel natural, not patterned.
Step 1: Draw 2-3 foreground full sunflowers, then add 6-10 blooms that look more seed-head heavy — fewer petals and a more dominant center. Step 2: Shade foreground centers with tight stippling and darken stems; soften midground blooms with lighter pressure and smudging. Step 3: For the background, draw only outlines and a few center dots, then blend a light gray-blue haze around the horizon.
Common mistakeDon’t make every seed head identical. One or two different angles is enough.
17. Sunflower field with paper cutout collage sky
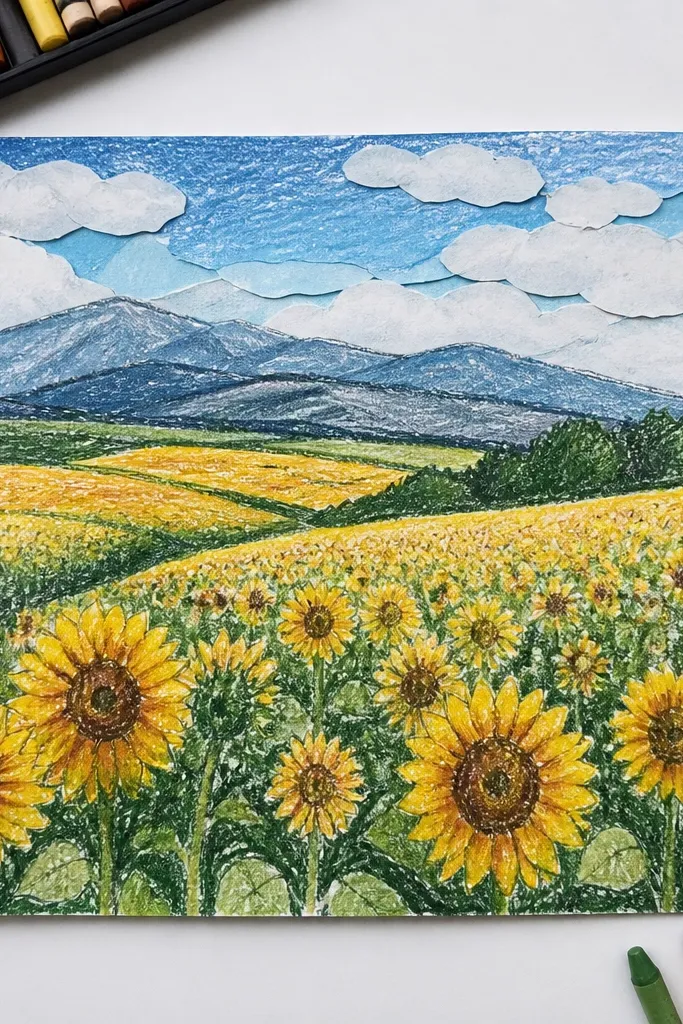
Collage skies make the drawing feel tactile and more “art piece” than just a sketch. You draw the sunflower field normally, then build the sky from layered torn paper or textured scraps in pale yellow, light gray-blue, and soft lavender. The edges of torn paper create natural haze, which is exactly the dreamy effect you want. Keep your sunflower outlines crisp so the collage sky doesn’t overwhelm the flowers.
Good to knowUse a thin foam brush for matte medium so you don’t smear torn edges.
Step 1: Cut sky pieces from paper scraps in 2-3 tones and glue them down lightly, leaving torn edges visible. Step 2: Draw sunflowers over the collage sky using pencil first, then color petals with warm yellow and add center dots. Step 3: Seal the whole piece with a matte medium so the collage doesn’t lift, then touch up any petal shadows after drying.
Common mistakeDon’t use thick cardstock for the sky pieces. It creates bumps under glue that look messy.
18. Sunflower field with ink stipple ground texture
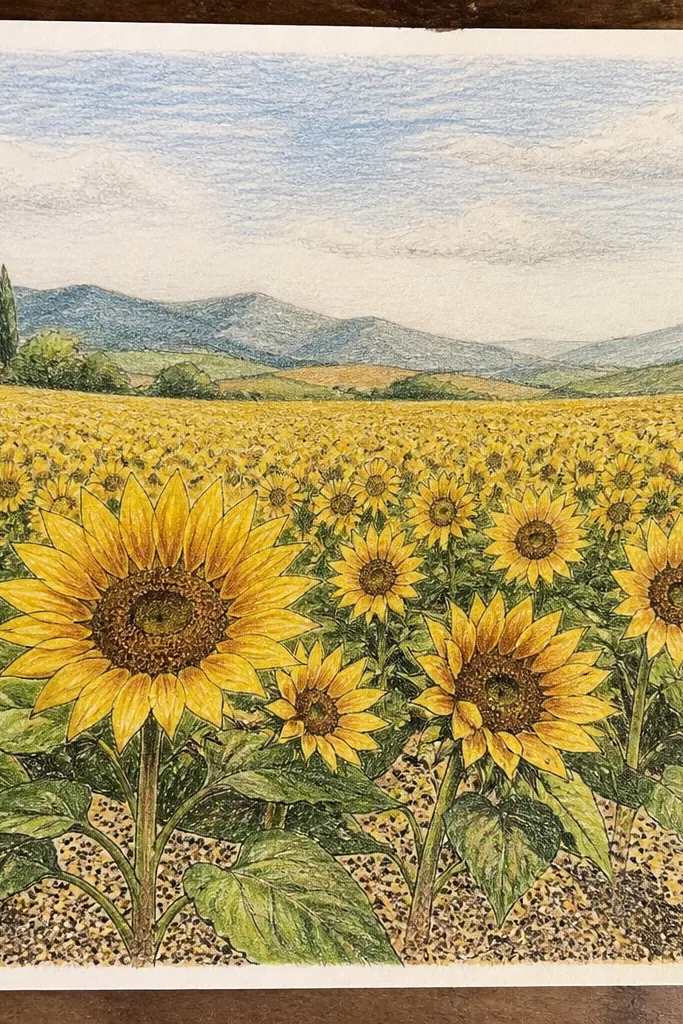
Stippled ground makes your sunflower field look like it has soil texture and depth, even if the sky is simple. This idea focuses on the base: you build a dotted, speckled ground in the foreground and let it fade as it moves back. Sunflowers pop because the ground has value contrast. It’s also a great way to hide uneven marker or pencil coverage on your paper.
Good to knowStipple in small zones, not the whole page at once, so you can control density.
Step 1: Sketch your sunflowers and horizon lightly, then start stippling the ground area underneath the foreground blooms with a fine liner. Step 2: As you move toward the horizon, reduce dot density until the ground becomes a light haze. Step 3: Add leaf clusters with shorter marks and shade stems darker in the front, then add center ring dots on each sunflower.
Common mistakeAvoid giant dots. Small dots make the ground look like texture, not confetti.
19. Sunflower field with watercolor splatter highlights
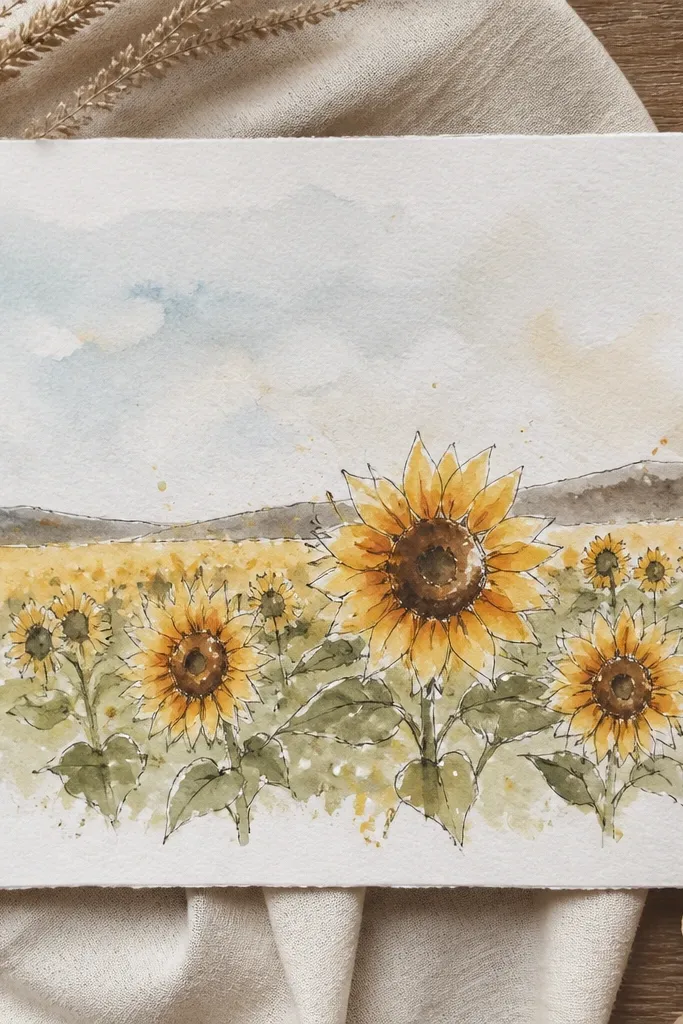
Splatter can look aesthetic when it’s controlled and placed where light would hit. Use it sparingly on the sky and around the tops of foreground petals so it looks like sunlight sparkle. Keep your sunflower shapes clean and shaded normally; the splatter is an accent, not the main texture. This version photographs well because the tiny specks create a lively surface without clutter.
Step 1: Paint or blend a light sky gradient, then let it dry. Step 2: Draw and shade sunflowers with pencil or marker, then flick diluted yellow and white watercolor near the top half of the page. Step 3: Add centers with dots and a darker center core, then lightly blend any splatter that lands too harshly using a damp brush.
Practice the flick on scrap paper. You want tiny dots, not visible blobs.
Don’t splatter over dark centers. It muddies the focal detail.
20. Sunflowers with night-sky stars and moonlit glow
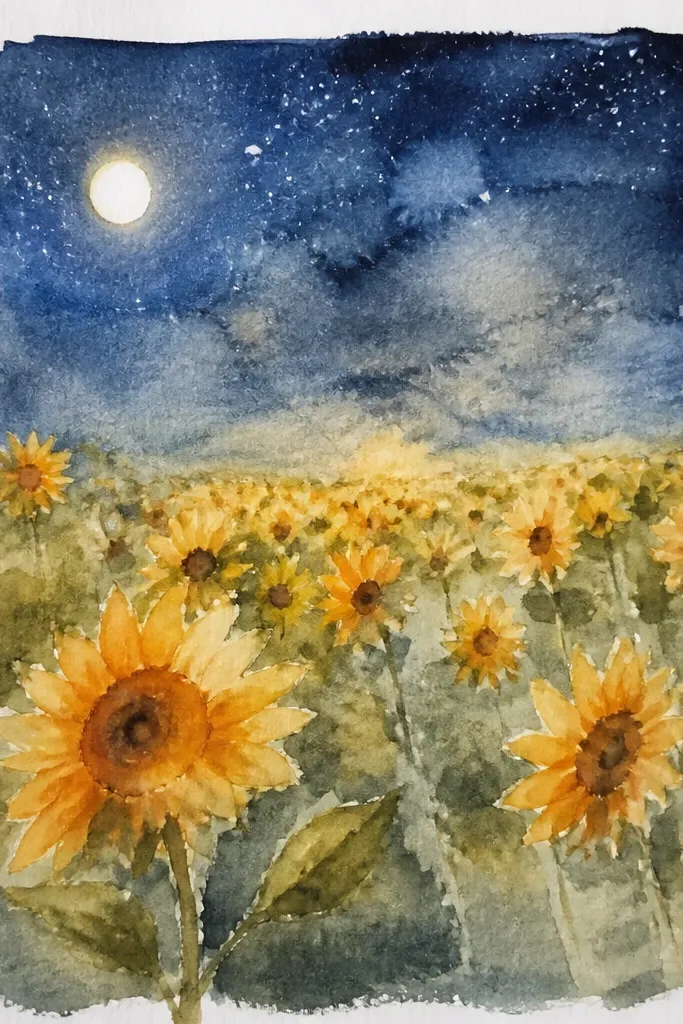
Night-sky sunflowers look dreamy because they twist the expected palette and create a clear mood. Put the brightest glow near the horizon or behind a tall bloom, then use cool blue shadows on stems and leaves. The petals still read as warm, but you keep their shadows blue-violet. Stars should be minimal — a few clusters — so the field stays the focus.
Step 1: Sketch sunflowers with clear silhouettes and keep background blooms lighter and simpler. Step 2: Color the sky with deep blue or black watercolor, then add a soft moon glow using a light wash circle behind the tall sunflower. Step 3: Add a few star dots with white gel pen, then shade leaves with blue-violet pencil under each head and along stem overlaps.
Use a white gel pen for stars after the sky is fully dry to avoid bleeding.
Don’t add hundreds of stars. Too many makes it look like a generic night sky.
21. Sunflower field with sunrise haze and soft vignette
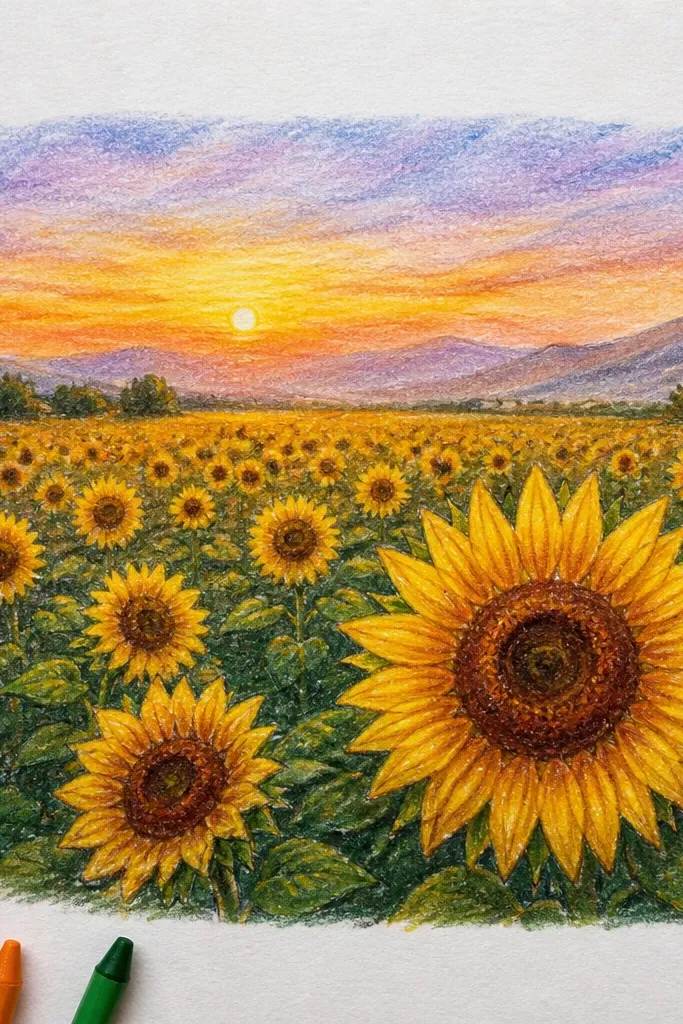
A soft vignette makes your page feel like a finished illustration because it frames the center without a hard border. This idea uses haze to hide the horizon line and makes the foreground feel grounded. Keep the sky warm near the horizon and fade it outward so the sunflowers stand out. It’s aesthetic even with simple shapes because the lighting does the styling.
Good to knowWork vignette edges last so you don’t accidentally darken the sky too early.
Step 1: Draw the horizon and sketch sunflowers in 3 layers: foreground detailed, midground lighter, background minimal. Step 2: Blend a warm sunrise gradient near the horizon, then darken the outer edges with a very light gray-brown pencil for vignette. Step 3: Add haze by erasing and softening the area just above the horizon line and lightly shading stems with a translucent layer.
Common mistakeAvoid a harsh circular vignette. It should fade, not form a visible ring.
22. Sunflowers with hand-lettered sky labels
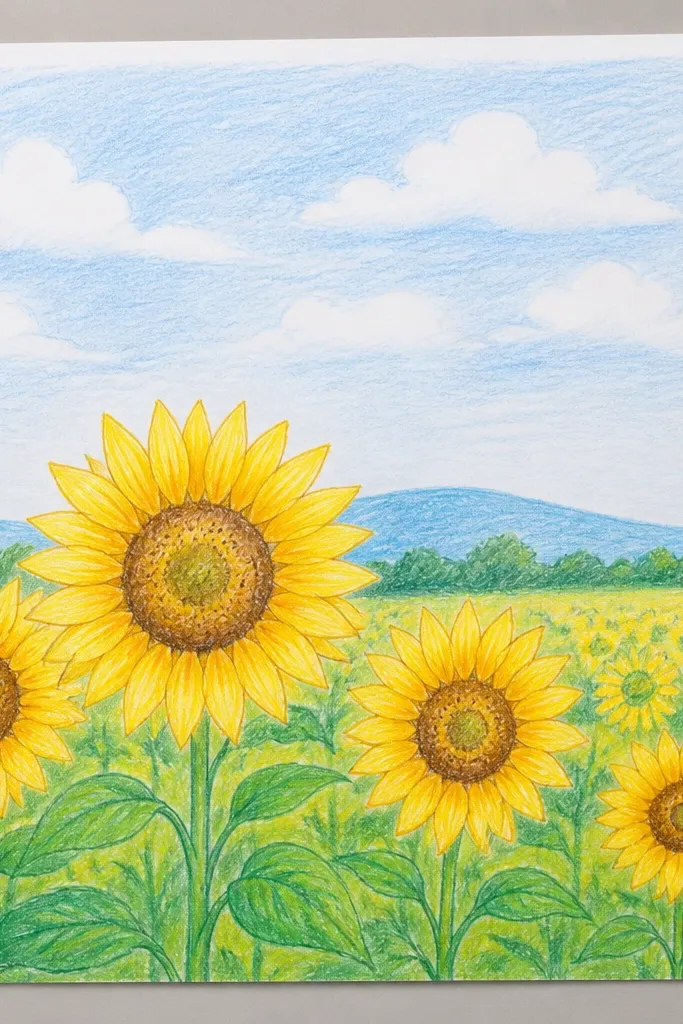
Hand-lettered labels make the drawing feel like a personal journal page, which is exactly the kind of aesthetic that looks good in photos. Keep the text small and placed high in the sky so it doesn’t compete with the flowers. Use simple words like “sunrise” or “field notes” — short phrases only. The field stays dreamy because the lettering is light and secondary, while the sunflowers remain the main focal point.
Good to knowUse a ruler for the baseline of the letters so the sky text looks intentional.
Step 1: Sketch sunflowers and sky first, leaving a clear empty area above the horizon for text. Step 2: Add a pale sky gradient and then write small, thin letters with a fineliner or brush pen. Step 3: Shade petals and centers last so you don’t smudge ink. Add a few leaf highlights so the page has texture around the text area.
Common mistakeDon’t write long sentences. Short labels look designed; paragraphs look messy.
23. Sunflower field in a watercolor wash frame border
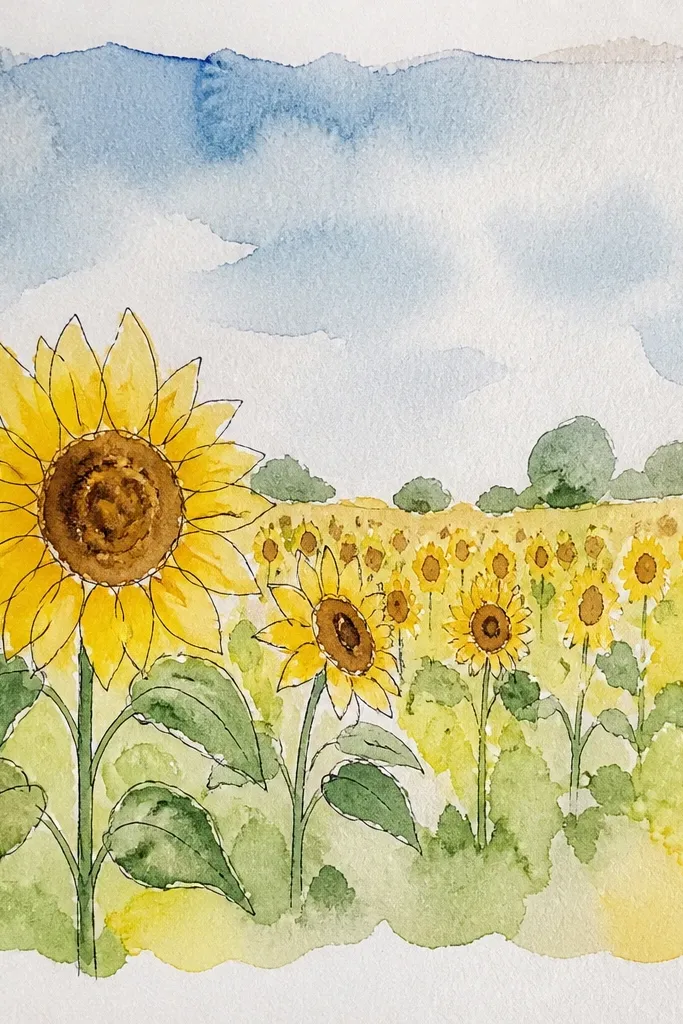
A watercolor wash border gives you a ready-to-frame look without drawing an obvious rectangle. It makes the scene feel contained, like a print, and it helps the sunflowers feel more “finished” in photos. Keep the border colors related to the sky so everything looks cohesive — peach, pale yellow, and soft gray-blue. Inside, you can draw sunflowers with pencil shading or marker, but don’t over-detail the border area.
Good to knowTape edges slightly back from the border so the wash doesn’t bleed into the margin.
Step 1: Mask or tape a margin around the page and paint a soft watercolor wash border using two tones, thicker at the corners. Step 2: After drying, sketch and shade your sunflower field inside the border with clear foreground depth. Step 3: Add shadows and centers, then remove tape carefully for crisp edges.
Common mistakeDon’t use dark brown in the border. It can overpower the warm sunflower palette.
24. Sunflower field with patterned horizon strip
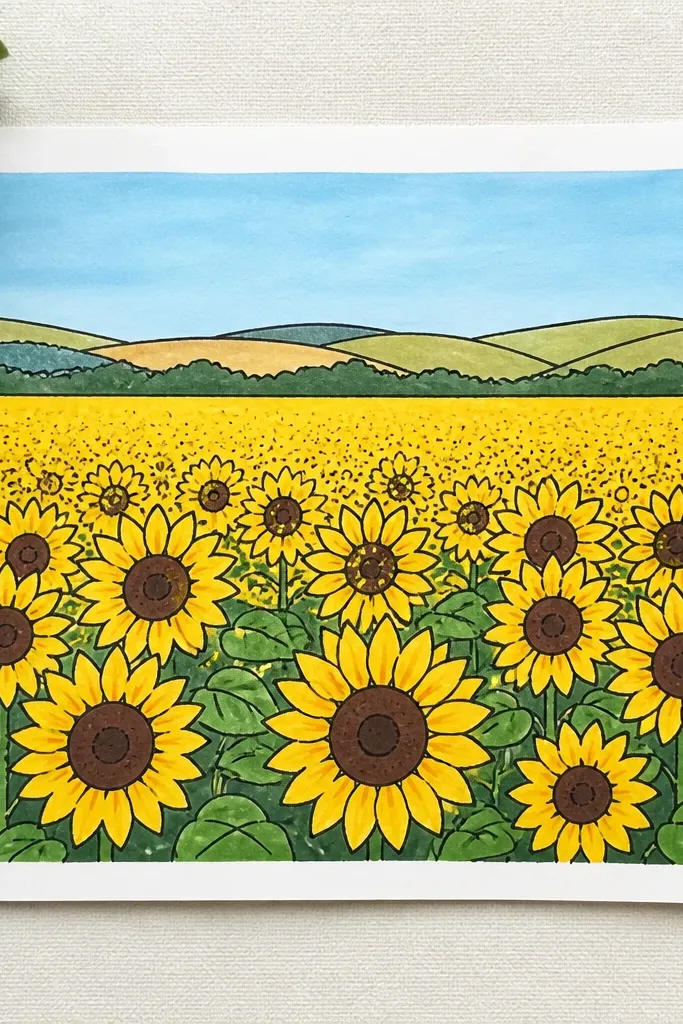
A patterned horizon strip is a sneaky way to make your drawing look designed. Instead of a plain horizon line, add a band with subtle repeating texture — tiny dashes, thin zigzags, or watercolor granulation. It gives the ground and distance a visual rhythm, which reads as aesthetic in photos. Keep the sky above simple so your pattern doesn’t compete with the petals.
Good to knowMake the pattern smaller in the back. Scale tricks the eye into depth.
Step 1: Draw the horizon and sketch your sunflowers in 3 layers, leaving the horizon area open for the pattern. Step 2: Add a thin band across the page at the horizon using dashes or zigzags, then lightly blend with a warm yellow wash. Step 3: Shade stems darker in foreground and fade with lighter lines as they approach the patterned strip.
Common mistakeAvoid a thick band. A thin strip looks like atmosphere; a thick one looks like a sticker.
25. Sunflower field with mixed media pencil-and-pastel glow
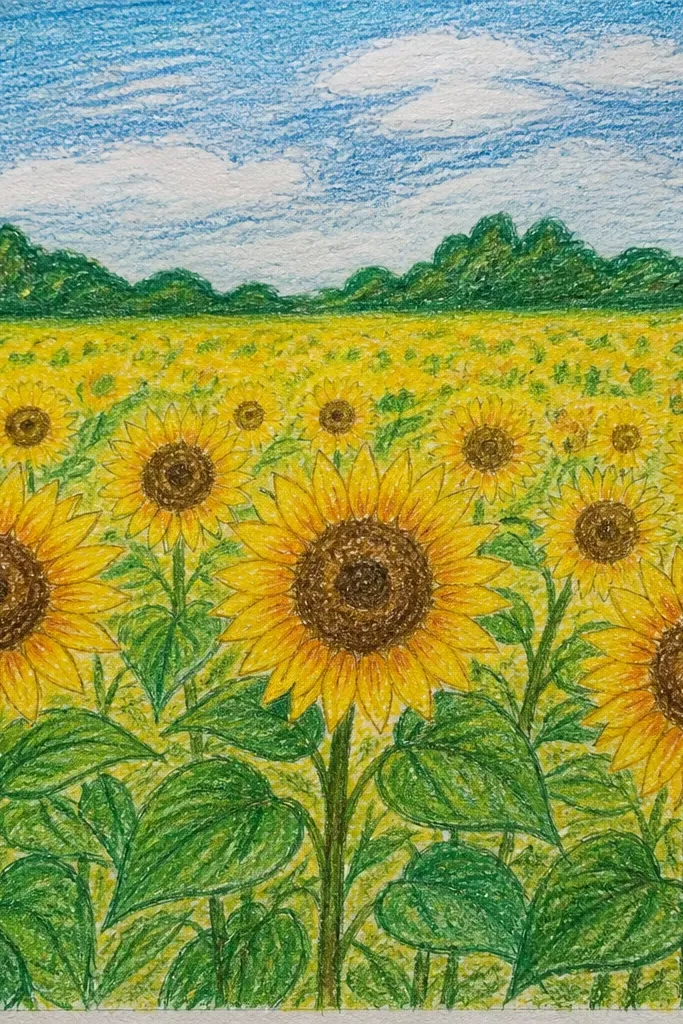
Mixed media gives you that dreamy glow without overworking the drawing. Use colored pencil for structure (petals and leaves), then add soft pastel or pastel pencil for highlights on petals and the sky near the horizon. The pastel creates a gentle haze that looks photogenic, especially where light hits. Keep pastel limited to highlights and transitions, not the whole flower, so outlines stay crisp.
Good to knowFixative after pastel prevents smearing when you add final pencil details.
Step 1: Draw the full sunflower field in pencil with clear shapes and a light horizon gradient. Step 2: Shade petals and centers with colored pencil, then tap pastel pencil on top only in highlight areas and near the horizon. Step 3: Blend pastel lightly with a soft brush or paper stump, then lock with a matte fixative if you’re using loose pastel.
Common mistakeDon’t layer heavy pencil over pastel immediately. It smudges and dulls the glow.



