1. Cabinet Door Half Sunflower with Seed-Head Center
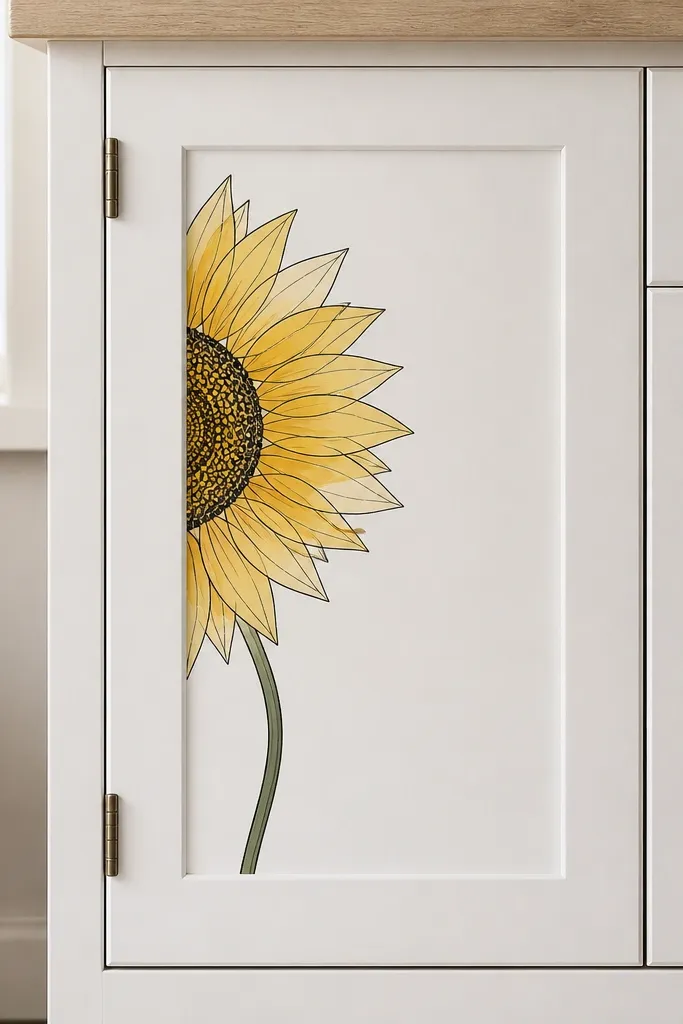
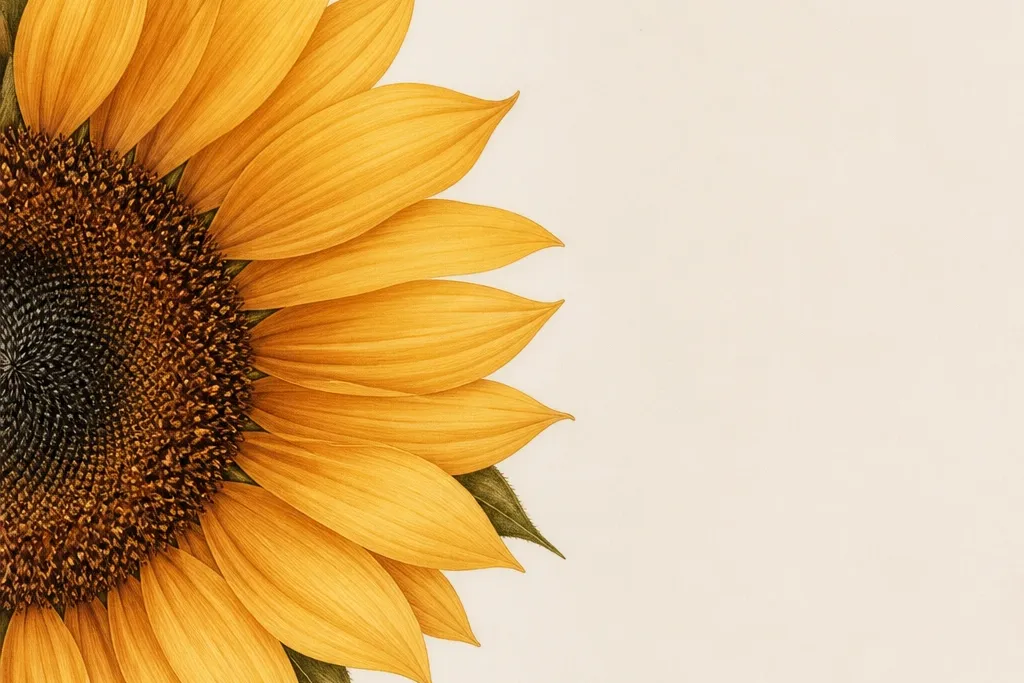
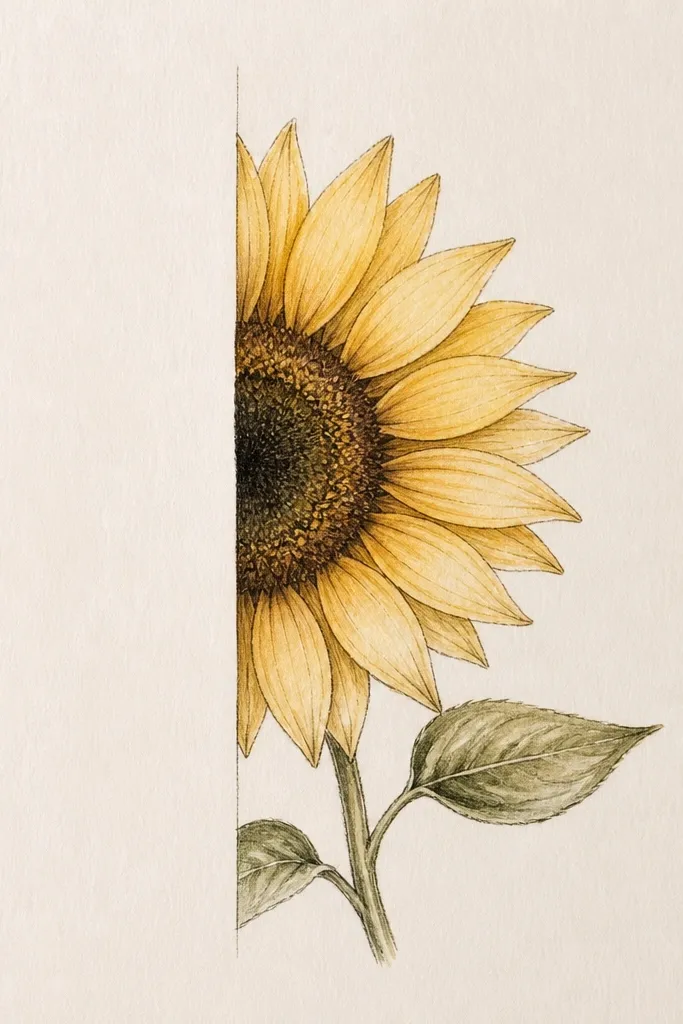
I use this layout on narrow cabinet doors because the seed head gives you a strong center even when the petals are cropped. Draw the sunflower so the stem line follows the door's vertical plane, then let the petals fan outward only within the door width. I've done it on matte painted cabinets where the black outline stays crisp, and the yellows pop without looking shiny. This looks best on cool-toned paint like soft white or light gray, and it flatters warm undertones because the sunflower yellows pull the eye toward your door hardware.
Start by cleaning the cabinet door and lightly sanding with 220 grit if it's glossy. Tape a 1-inch grid lightly with painter's tape so you can place the seed head circle at the visual center of the panel. Draw the seed head first - a tight circle with small dot clusters - then sketch the stem as a single curved line. Finally, add petals in 2 yellow shades: butter yellow for the top edges and mustard yellow for the inner petal shadows, and finish with a thin green leaf vein line near the bottom edge.
Good to knowSeal over your drawing with a satin clear coat so the linework doesn't scuff when you wipe the cabinet.
Common mistakeSkip thick marker strokes - they bleed into cabinet paint and make the half sunflower look messy.
2. Thrift Frame Half Sunflower in Watercolor Wash
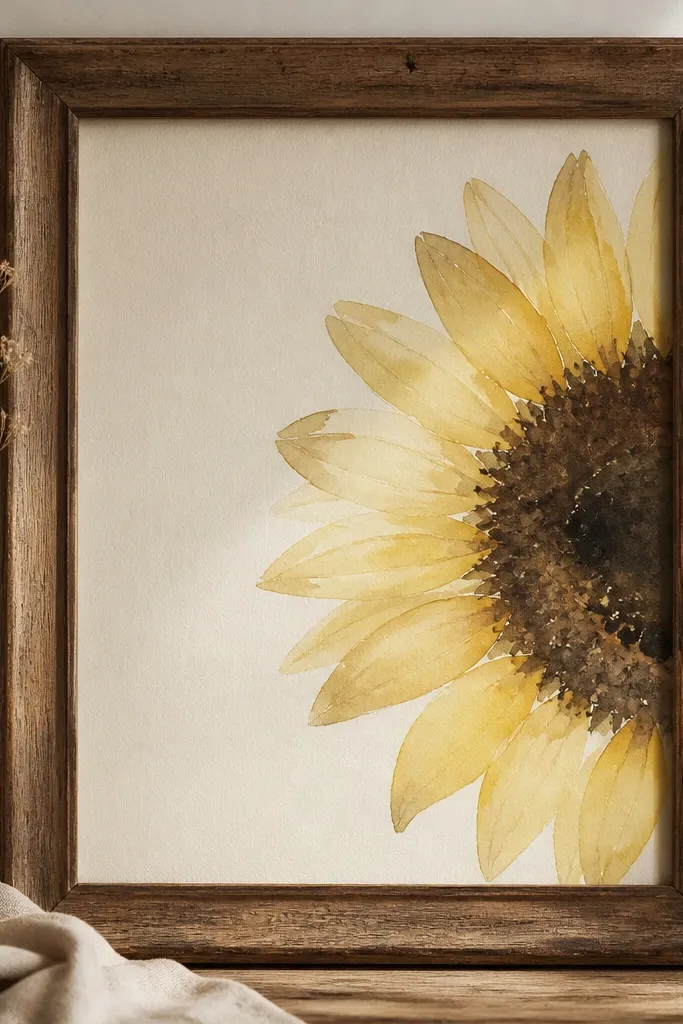
This one is for the frames you can't stop staring at but the inside looks too plain. The watercolor-style half sunflower looks airy because the petals are semi-transparent and the seed head stays light enough to read at a distance. I've used this on frames with warm wood tones and a cream mat - it makes the whole piece feel cozy without being loud. It flatters small spaces because the edges stay soft, so your eye doesn't feel boxed in by hard lines.
Start by removing the old backing and mat if you have it, then tape the inside border with painter's tape to protect the frame edges. Mix 2 washes: one pale yellow (add a lot of water) and one deeper yellow (less water), and paint only the visible half petals leaving paper texture showing. Add the seed head by tapping a dark brown or dark gray ink with a stiff brush - tiny specks, not full scribbles. Let it dry fully, then add a thin green stem line with a fineliner so the watercolor doesn't drift.
Good to knowIf you want extra glow, add a single highlight line on each petal edge using a dry brush and almost-white yellow paint.
Common mistakeDon't outline everything in black - the watercolor look loses its softness and starts looking like coloring-book art.
3. Small Shelf Bracket Half Sunflower on Upcycled Wood Slat
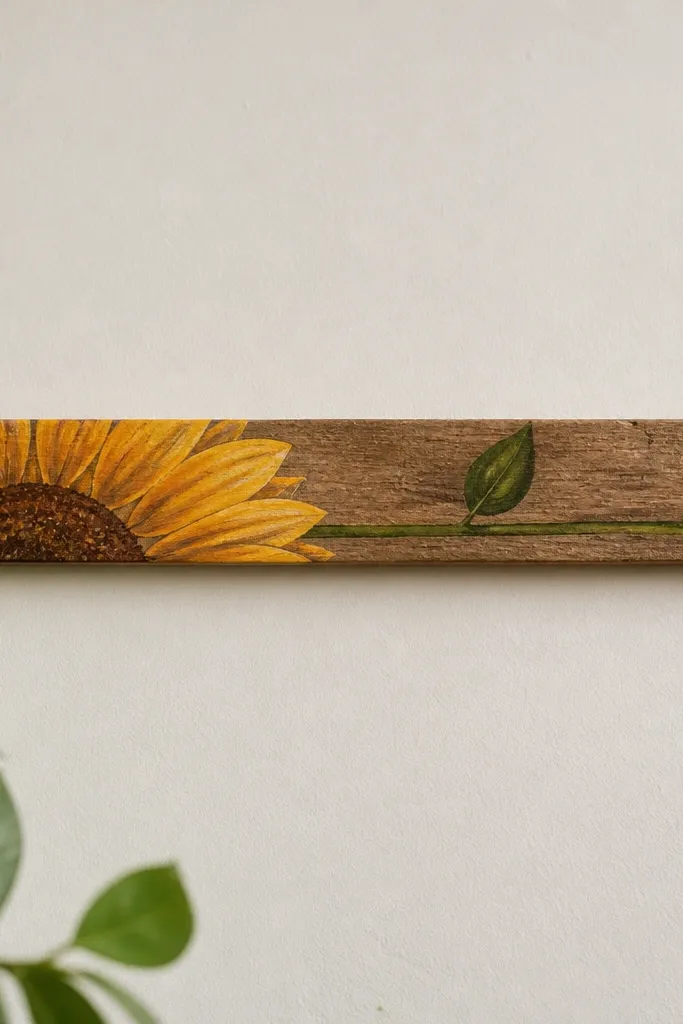
When space is tight, you want a design that travels along the object, not across it. This half sunflower runs with the slat, so it reads even from the side. I've painted this on thin wood brackets because the grain texture makes the sunflower feel handmade. It works especially well in kitchens and entryways because the earthy wood and green lines keep the brightness grounded.
Start by sanding the slat with 150 grit, then wipe dust with a tack cloth. Paint a thin base coat in warm off-white, then let it dry. Sketch the seed head circle so it sits near one end of the slat, then draw a long stem line that follows the slat's length. Add petals only in the open half - keep them shorter than you think so they don't spill off the slat - and finish with one leaf using a simple teardrop shape and a single central vein.
Good to knowUse a foam roller for the base coat; it leaves fewer streaks than a brush on narrow pieces.
Common mistakeAvoid placing the seed head dead center on a narrow slat - it makes the petals feel crowded on both sides.
4. Denim Jacket Pocket Half Sunflower Patch with Seed Stitching
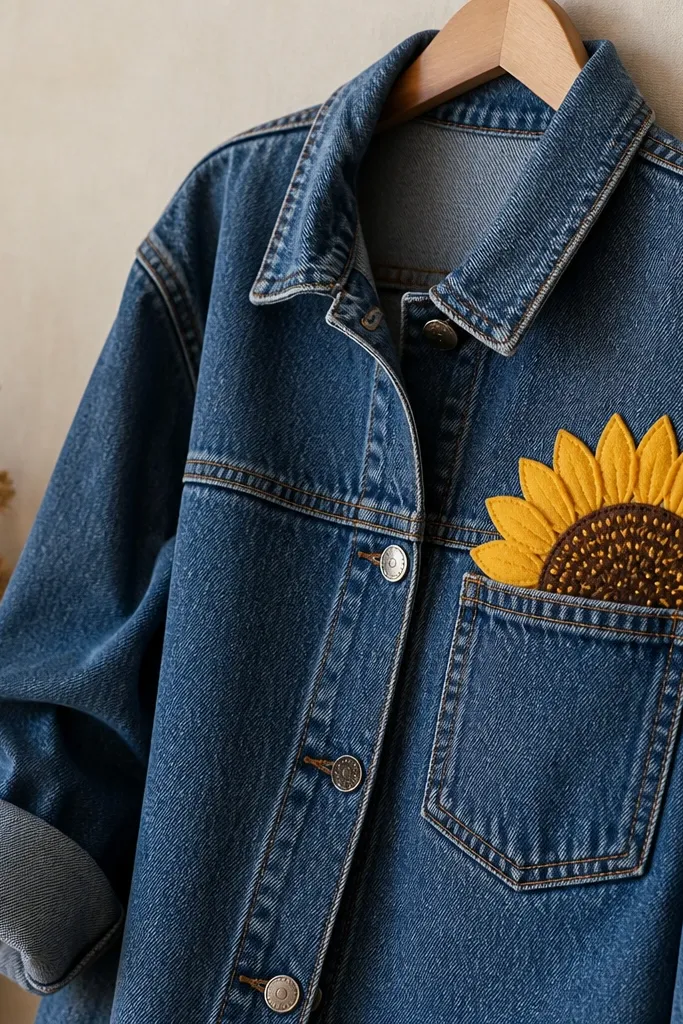
This is my favorite "wearable wall art" version because it turns a tiny pocket into a focal point. The felt petals give crisp edges, and the stitched seed head adds texture that looks good in daylight. I've done this for friends who hate big embroidery projects; the half sunflower lets you finish quickly without losing the charm. It suits medium to deep skin tones especially well when you wear it with warm colors like rust, cream, or olive.
Start by tracing a half sunflower template onto yellow felt and cut 12-16 petals in two shades. Cut one half seed head circle from dark brown felt, then mark stitch lines with a light pencil dot grid. Position the patch on the pocket flap and baste with thread so it doesn't shift. Then sew petals with a simple blanket stitch along the outer edges, and stitch the seed head using tight small straight stitches filled across the circle.
Good to knowUse a 2-ply embroidery thread for the seed head so it looks dense without taking forever.
Common mistakeSkip stretchy thread - it puckers felt edges and makes the half sunflower look uneven.
5. Sunflower Half on Upcycled Picture Book Cover for a Tiny Nook
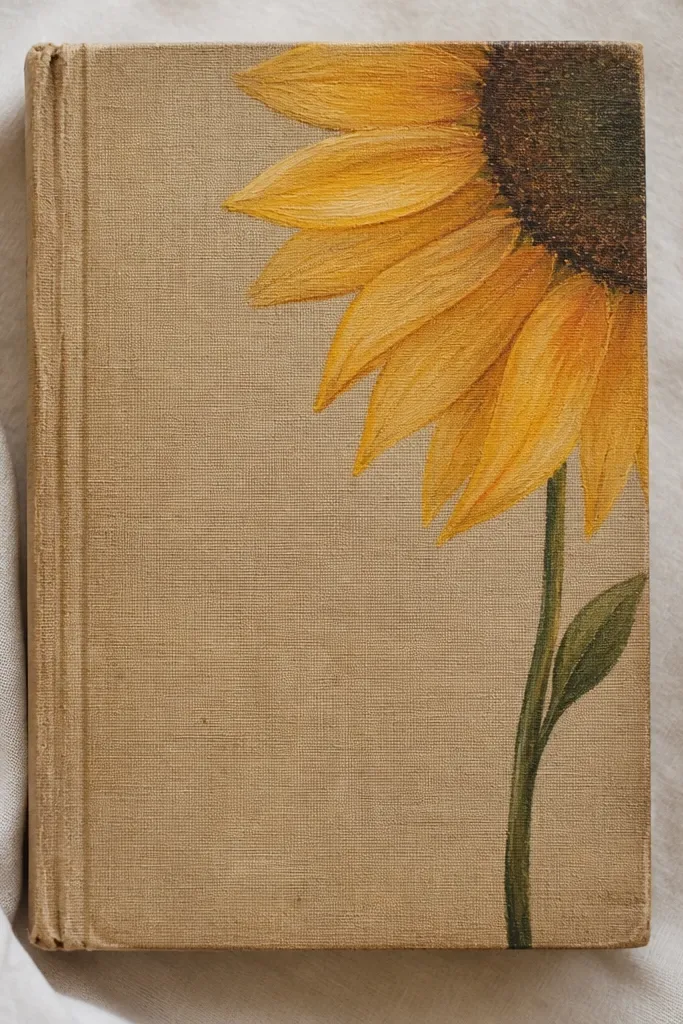
This is for the wall space you don't want to commit to - like above a desk, a small landing, or a narrow hallway. A book-cover canvas gives you a flat, light surface and the half sunflower works because it's already shaped like a panel. I've used it with a single nail and a simple twine hanger, and it looks intentional from across the room. Pair it with muted decor because the sunflower yellows need a calmer background to stay clean.
Start by removing the old glossy cover if it's peeling, then sand lightly so paint grabs. Paint a matte background in warm white, then draw your seed head circle near the top corner so it's not centered. Sketch the stem line curving diagonally down, and add only the petals that fit the open half of the book cover. Finish with tiny seed dots in dark brown using a toothpick or the tip of a fine brush.
Good to knowSeal the book cover with matte varnish so the paint doesn't smear when you wipe dust.
Common mistakeDon't place the seed head too low - it makes the half sunflower feel like it's falling off the panel.
6. Half Sunflower on Terracotta Pot Saucer with Ombre Petals
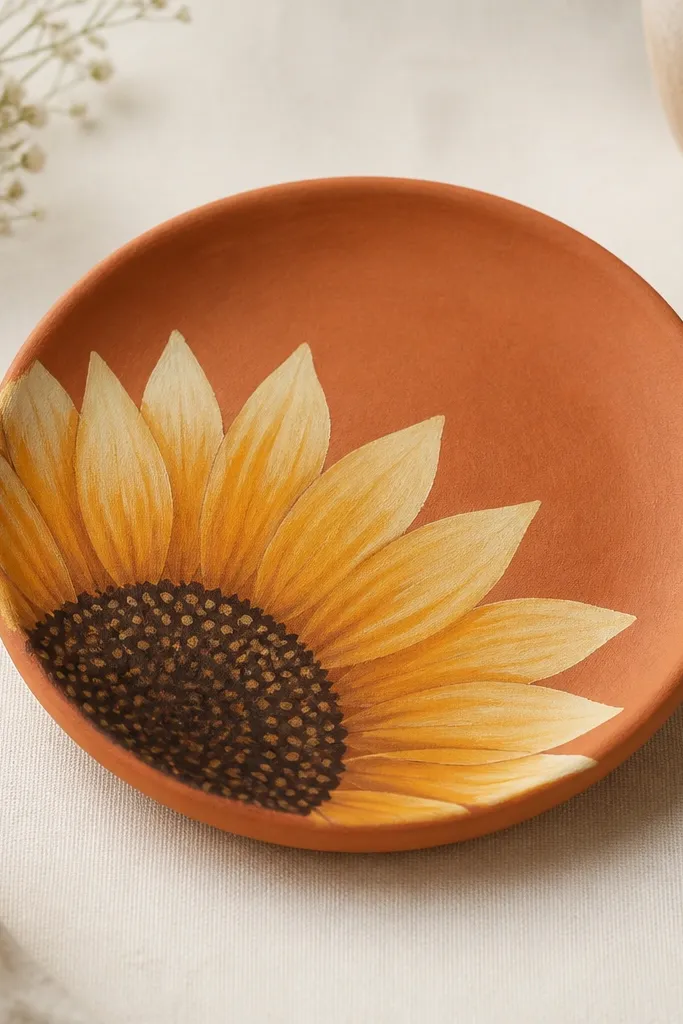
This one turns a small object into decor that looks good on windowsills. The saucer is already circular, so a half sunflower looks like it's growing out of the rim. I've painted these for plant corners where the pot is busy - the ombre petals calm the look while still keeping the sunflower bright. It flatters green plants because the yellow and brown seed head make leaves look darker and more defined.
Start by cleaning the saucer thoroughly and drying it fully. Paint a light beige base coat on the area where the sunflower will sit. Block in the petal shapes as simple teardrops in deep mustard, then add a lighter yellow glaze on the top half of each petal for ombre. Add the seed head last with a dark brown dot pattern, then outline the stem and one leaf in muted green.
Good to knowLet your first petal layer dry before glazing; otherwise the ombre turns muddy.
Common mistakeAvoid painting on dusty terracotta - the paint lifts and your half sunflower edges look ragged.
7. Half Sunflower Drawing on Canvas Tote with Stencil Edges
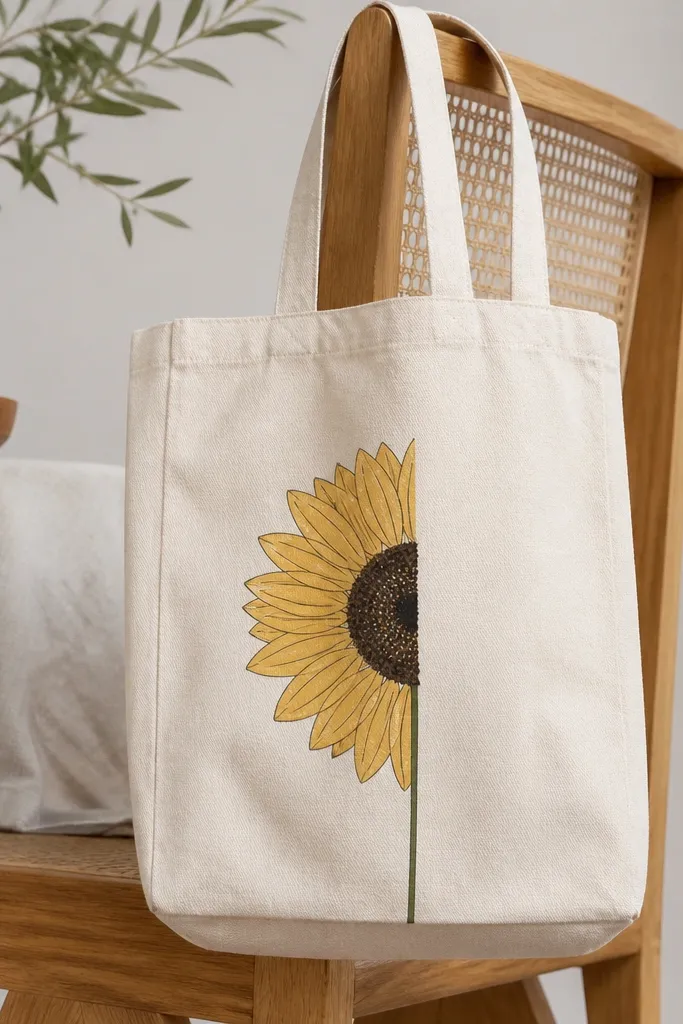
On a tote, crisp edges matter because fabric stretches and your lines get stretched too if you freehand everything. A half sunflower works because the cropped petals look graphic, like a poster. I've used this with a 2-color stencil (yellow petals, dark seed head) and it held up through regular use. It flatters people who like clean, bold art and pairs well with denim, black leggings, and simple gold jewelry.
Start by ironing the tote flat and tracing a stencil placement guide with chalk. Press the stencil down firmly and tape corners so it doesn't lift. Dab acrylic yellow paint with a sponge - don't brush - then peel the stencil after 30-60 seconds so edges stay sharp. Add the seed head dots with a small round brush and a dark brown paint, then draw one leaf and a thin stem line in muted green.
Good to knowWash the tote once before painting so the fabric absorbs paint evenly.
Common mistakeSkip thick paint layers - they crack on canvas flexing.
8. Half Sunflower on Bathroom Mirror Edge Using Vinyl Stencil
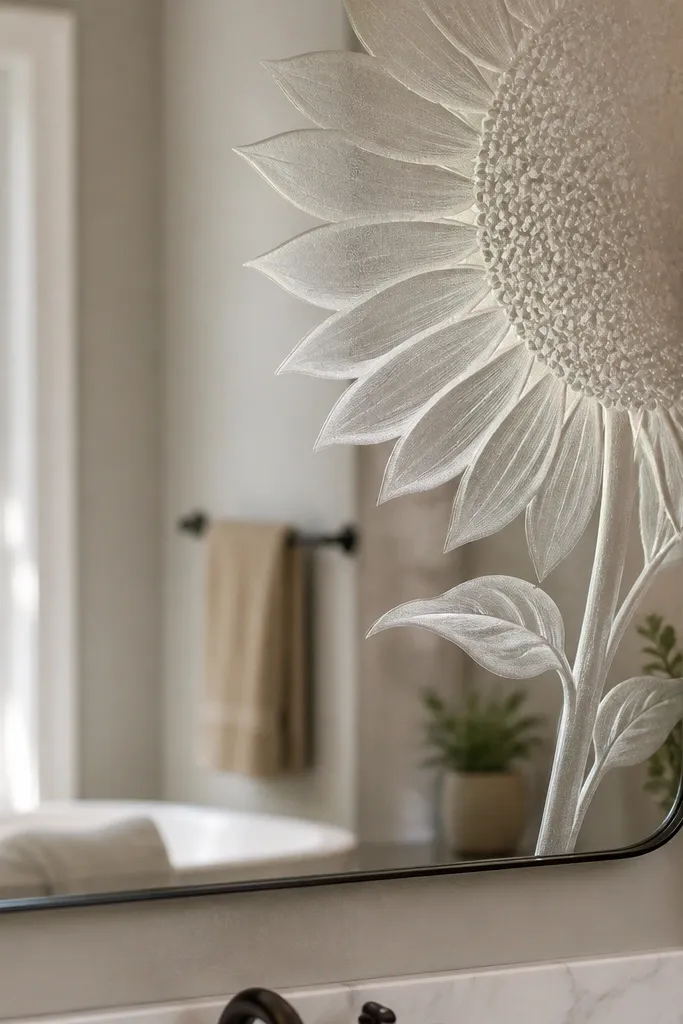
I like this on mirrors because it frames your face without covering the whole surface. The half sunflower sits in the corner, so your small bathroom still feels bright. I've done it with vinyl frost-style stencil paint and it looks clean even when steam hits the room. This works best when your mirror frame is simple - white, black, or brushed metal - so the sunflower becomes the only decorative moment.
Start by cleaning the mirror glass with glass cleaner and letting it dry completely. Press vinyl stencil film where you want the half sunflower, aligning the seed head near the top corner and the stem curve toward the opposite side. Use a foam stencil brush to apply a thin layer of frosted glass paint over the open petal areas. Peel the stencil carefully after the paint sets for the recommended time, then add a thin dark line accent around the seed head with a paint pen.
Good to knowMask the rest of the mirror with painter's tape so accidental overspray doesn't dull your reflection.
Common mistakeDon't skip drying time - pulling the stencil too early smears the edges.
9. Half Sunflower Wall Art on Thin MDF with Burnt Umber Outline
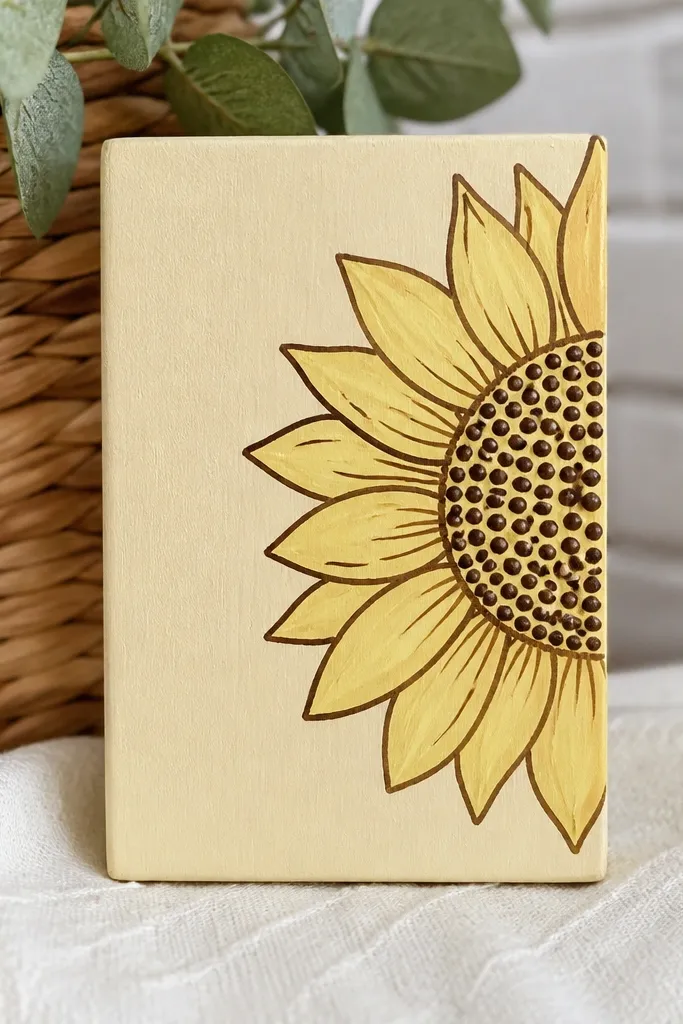
MDF is smooth, which makes it perfect for clean linework. This design uses burnt umber instead of black, and that one change makes it feel warmer and less harsh. I've hung these in tight hall corners where the lighting is flat, and the sunflower still reads because the outline is crisp and the seed head has dot texture. It flatters warm woods and brass fixtures, especially if your space already has tan or honey tones.
Start by sanding the MDF lightly and wiping dust. Paint a thin cream base coat, then let it dry. Use a pencil to map the half sunflower: seed head circle near one side, petals cropped to the board edge, stem line angled slightly. Outline with burnt umber acrylic using a fine brush, fill petals with pale yellow, then add a deeper mustard shadow at the petal base and dot the seed head with dark brown.
Good to knowLightly dry-brush a tiny bit of beige around the petals so the edges blend into the background.
Common mistakeAvoid pure black outlines - they make the half sunflower look like a sticker on MDF.
10. Half Sunflower on Old Cutting Board with Pyrography Seed Texture
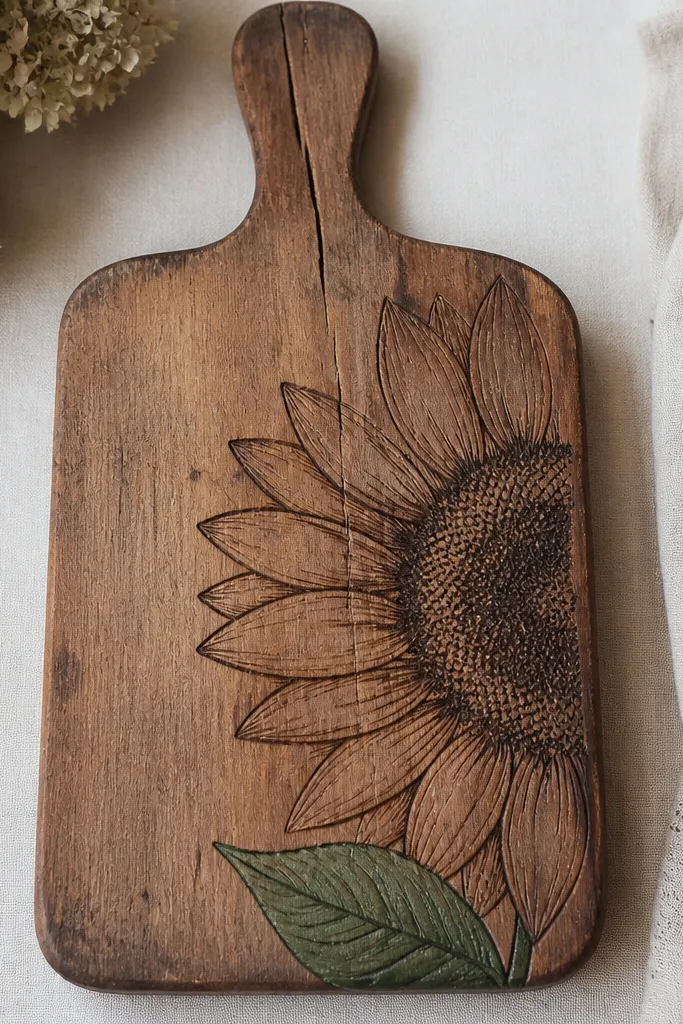
This is the one I do when I want it to feel handmade and not printed. Pyrography gives you natural shading, and the half sunflower looks like it's growing right out of the wood. I've made these for farmhouse-style kitchens and for gifts because people love the burned seed texture. It looks best on boards with visible grain and warm tones - oak, walnut, or reclaimed pine - because the design blends into the wood rather than sitting on top.
Start by sanding the board and wiping with a damp cloth, then let it dry. Sketch the half sunflower lightly with pencil, placing the seed head toward the upper area of the board. Burn the petals with light passes first, then deepen the petal bases for contrast. For the seed head, burn tiny dots in clusters - keep your dot size consistent - then paint one small leaf in muted green acrylic if you want a pop.
Good to knowFinish with food-safe mineral oil and a light buff so the burned lines stay readable.
Common mistakeDon't rush the seed head - uneven dot sizes make the half sunflower look accidental.
11. Half Sunflower on Painted Mason Jar Lid as Wall Catch-All
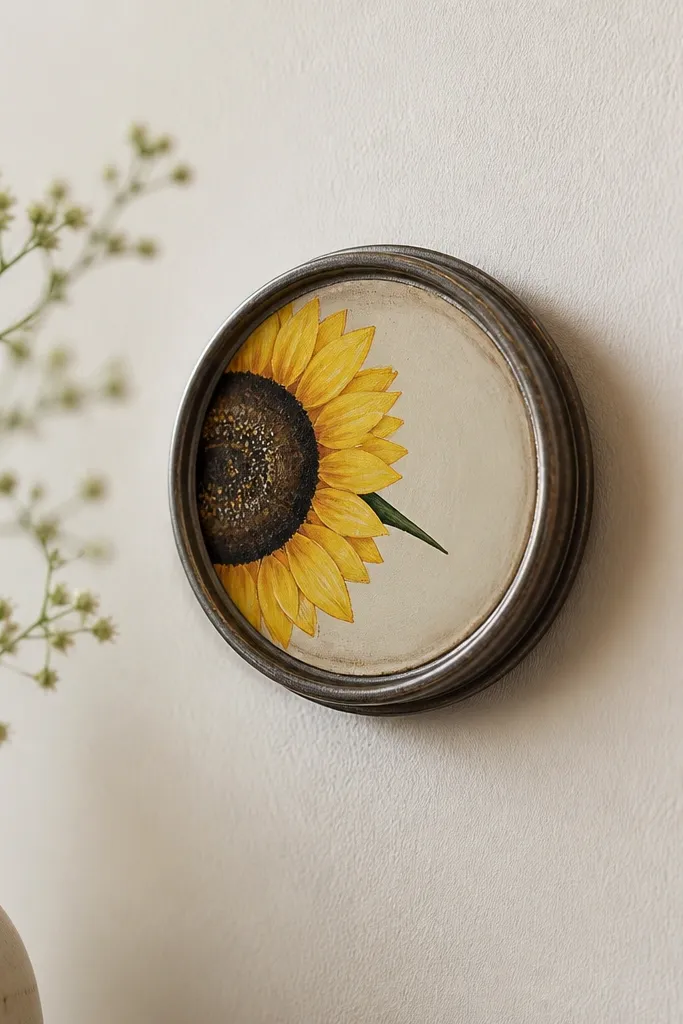
This is a tiny space fix that doesn't need a big frame. The jar lid is small, round, and already has a built-in border, so half a sunflower looks neat instead of cramped. I've used these near entry doors for keys and hair ties, and the sunflower keeps it from feeling like a generic hook. It works great if your walls are plain and you want one small cheerful spot.
Start by removing rust and sanding the lid, then spray it with a primer made for metal. Paint the lid face with a smooth matte cream, then let it dry fully. Draw the half sunflower so the seed head sits slightly off-center toward the top, and crop petals so they follow the lid's curve. Add seed dots in dark brown and a thin green stem line, then seal with a clear protective top coat.
Good to knowUse a white gel pen for a couple highlight dots on the seed head so it looks sunlit.
Common mistakeAvoid glossy clear coat - it makes the sunflower look like it's under plastic.
12. Half Sunflower on Drawer Front with Tape-Line Petal Layout
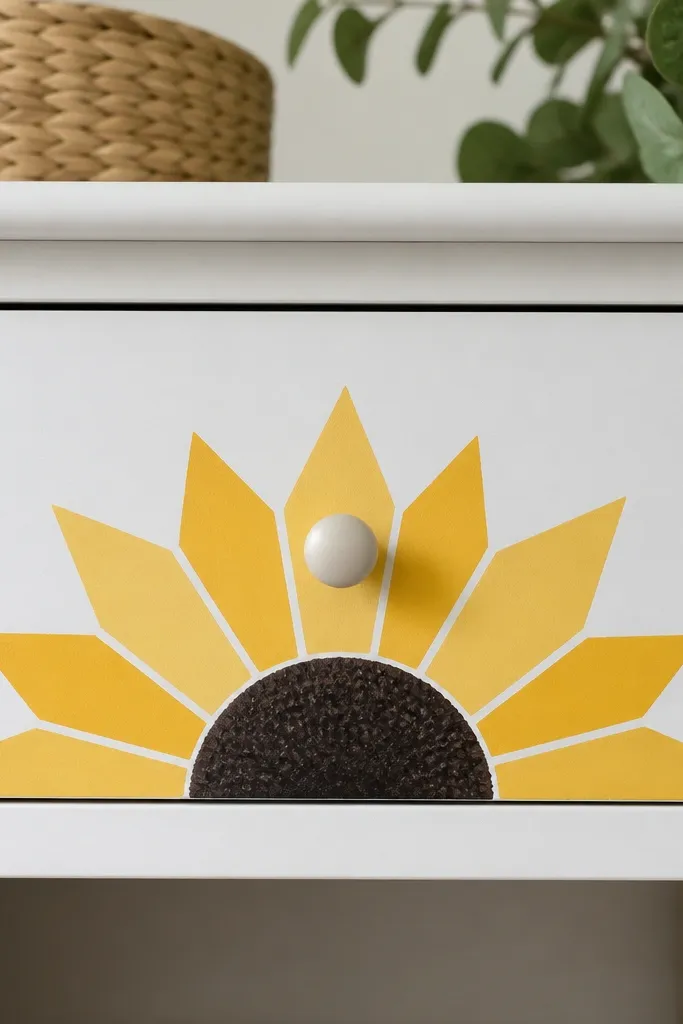
This is a design shortcut when you want crisp geometry. Drawer fronts have straight edges, so I use tape-line layout to keep the petals from wandering. The half sunflower looks graphic, almost like a logo, and it's great for renters who want a clean look without heavy decor. It flatters spaces with modern hardware because the lines match the drawer's structure.
Start by cleaning the drawer front and painting a smooth base coat if needed. Apply painter's tape to create a simple guide: a vertical stem line and a curved petal boundary. Draw petals as slightly squared teardrops inside the taped area, then remove tape before painting. Paint petals in two yellows, add seed dots in dark brown, and draw a single leaf in green at the bottom corner.
Good to knowPull the tape while paint is still slightly tacky for the cleanest edges.
Common mistakeDon't freehand the petal tips - they turn uneven fast on a drawer front.
13. Half Sunflower on Shelving End Panel with Tiny Leaf Balance
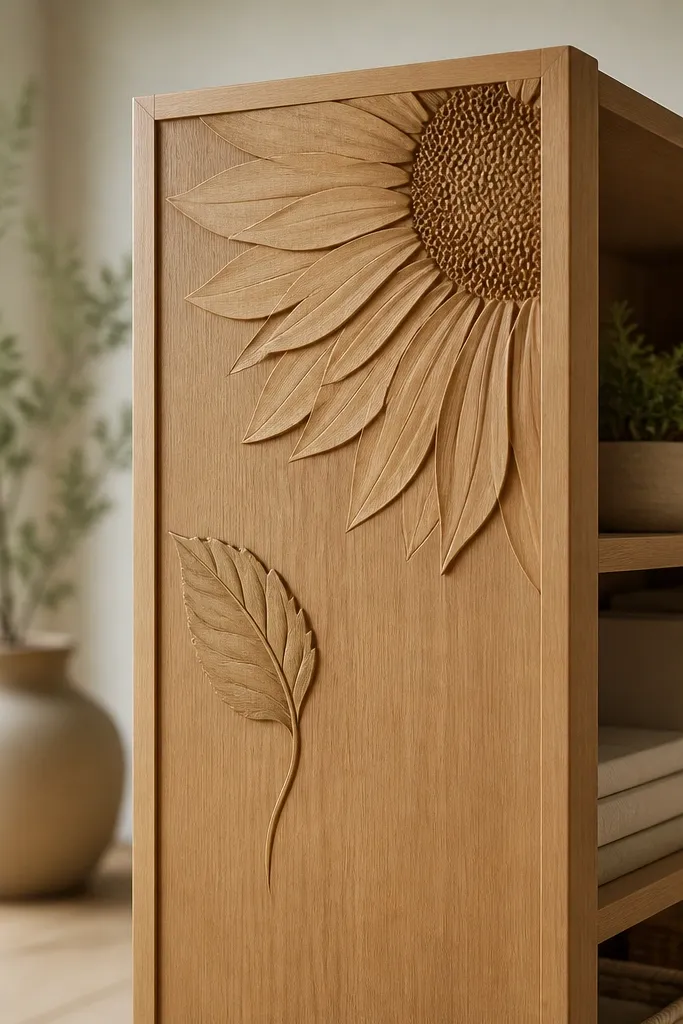
This design works when your half sunflower needs to sit near shelves, because shelves create visual competition. I place the seed head near the top and keep petals short so they don't collide with shelf lines. A tiny leaf balances the weight of the sunflower without adding clutter. I've used it on narrow shelving end panels in laundry rooms where the wall is busy with baskets; the half sunflower still reads because the leaf and stem are minimal.
Start by marking a top corner placement with a pencil dot. Draw the seed head circle first, then sketch the stem as a simple curve that ends near the panel center. Add only 8-10 petals so the half sunflower stays airy. Finish with a single small leaf and a few vein lines, all in muted green, then lightly shade petal bases with a deeper mustard to give it depth.
Good to knowIf your shelf has strong lines, keep your stem thinner than your petals so the drawing stays readable.
Common mistakeAvoid adding extra flowers - one leaf is enough to balance the half sunflower.
14. Half Sunflower on Corkboard with Thumbtack Seed Dots
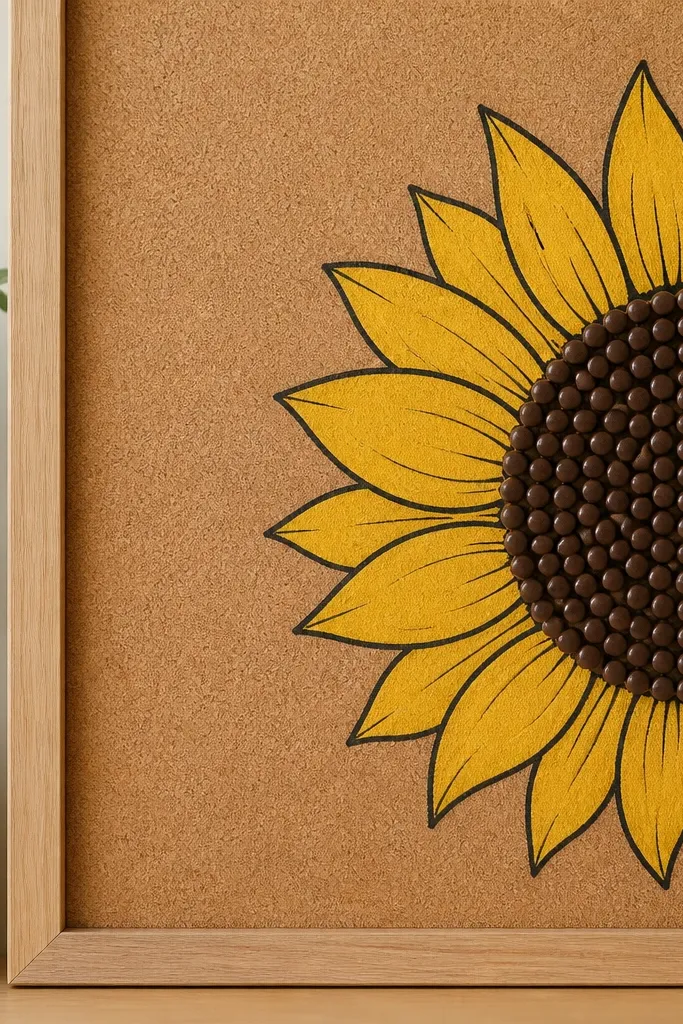
This one is fun because it turns the seed head into actual texture you can see from across the room. Half sunflower drawings work especially well on cork because the surface grabs marker and the thumbtacks create a crisp dot pattern. I've used this for small home offices where I want art that also helps me pin notes. It looks good with warm lighting and pairs nicely with beige, tan, and wood desks.
Start by drawing the half sunflower outline lightly with pencil on the cork. Outline petals with a black fine marker, then fill petals with yellow marker in two tones - pale yellow on the outer edge and deeper yellow inside. For the seed head, press thumbtacks into the cork in tight clusters around the circle, leaving small gaps for contrast. Add a green stem line with a thicker marker so it doesn't disappear against the cork texture.
Good to knowUse two sizes of thumbtacks for the seed head - tiny for the center and slightly larger for the ring - it makes the half sunflower look more dimensional.
Common mistakeDon't press thumbtacks too loosely - a wobbly seed head looks cheap.
15. Half Sunflower on Rolled Canvas for a Tiny Wall Hang
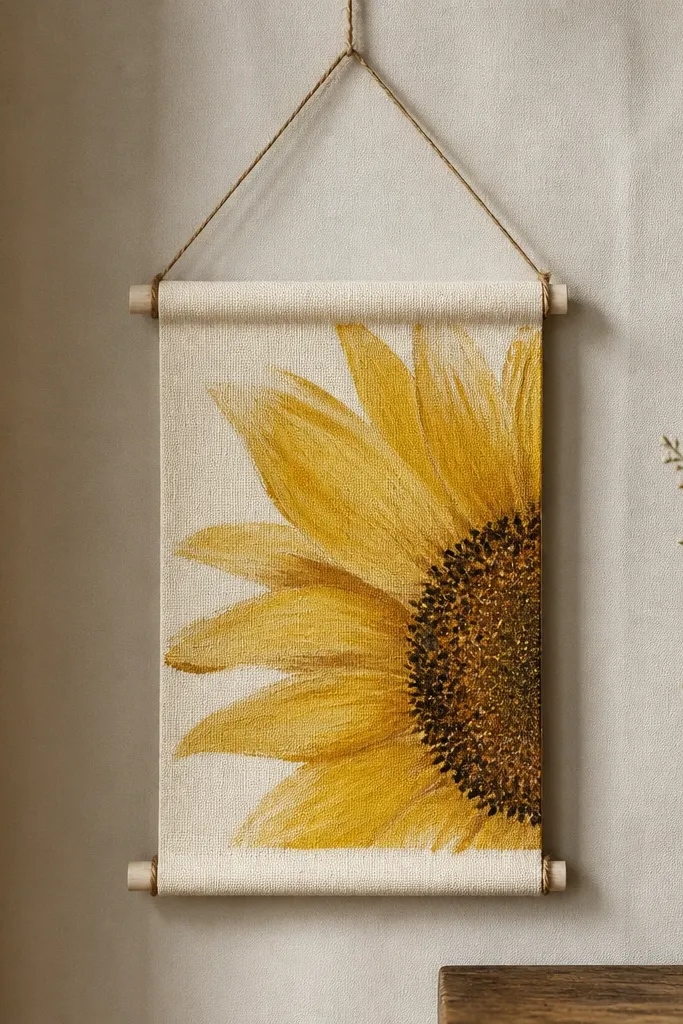
Rolled canvas gives you a softer look than a stretched canvas, and the half sunflower fits because it can spill slightly off the edge. I like this for small walls because the texture makes it feel handmade even if your space is plain. The loose brush petals keep the drawing from looking stiff, and the dot seed head pulls it together. It's best for people who prefer cozy decor - think linen curtains, light wood, and warm neutrals.
Start by painting the canvas base in a warm white wash, then let it dry. Sketch the seed head circle so it sits toward the top half of the canvas. Paint petals with a dry brush using yellow paint - don't cover every canvas thread, leave texture showing. Dot the seed head with brown paint using the end of a small brush, then paint a thin green stem line and one leaf in the negative space.
Good to knowRoll the canvas slightly while paint dries if you want subtle petal distortion that looks organic.
Common mistakeAvoid smooth, fully filled petals - on canvas texture they look flat and lose the charm.
16. Half Sunflower on Upcycled Metal Sign with Chalk Paint
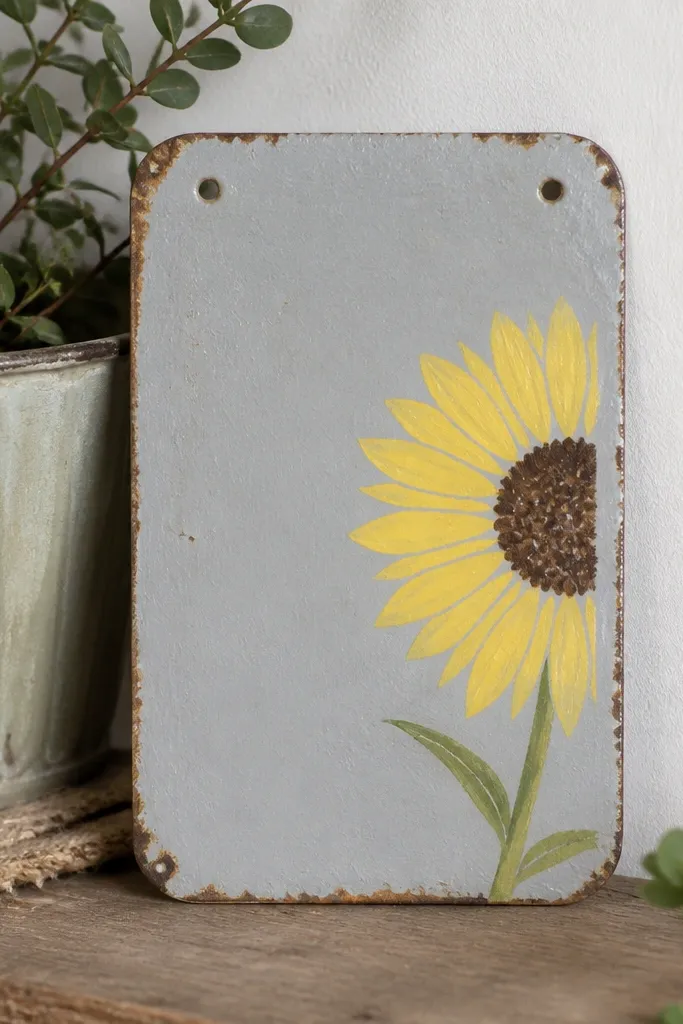
Metal signs work when you want something that survives real life - kitchen steam, hallway bumps, and quick wipes. Chalk paint grips well, and a half sunflower stencil keeps the edges clean even on curved metal. I've used this in entryways where the light is harsh, and the bright yellow still reads without glare. It looks great with black hooks and matte hardware because the sunflower becomes the only glossy-like color.
Start by sanding the metal lightly and wiping it clean with isopropyl alcohol so chalk paint sticks. Paint a full base coat in light gray, then dry. Apply a sunflower half stencil so the seed head sits closer to the top, and press down corners firmly. Dab bright yellow chalk paint through the stencil, then add seed dots in dark brown and a thin green stem and leaf with a small brush.
Good to knowLightly distress the edges with sandpaper once dry so the sunflower looks like it belongs on the sign.
Common mistakeDon't skip sealing - chalk paint scuffs fast on metal if you don't top coat.
17. Half Sunflower on Ceramic Tile Coaster with Gloss Seal
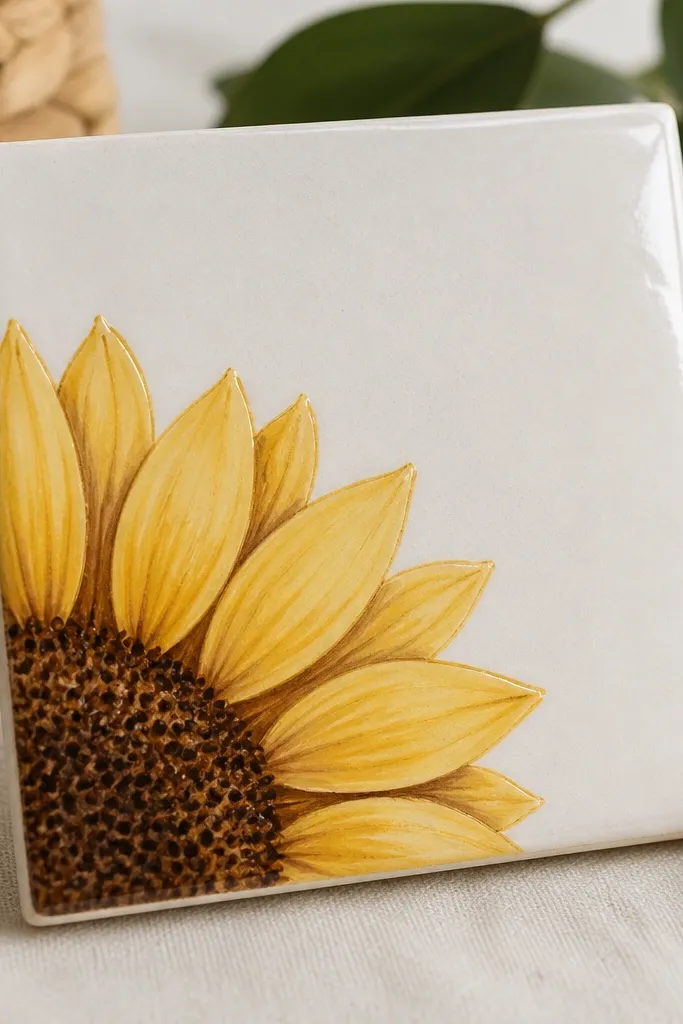
If you want your sunflower to feel finished and protected, ceramic tiles are the way I do it. A half sunflower on a coaster makes a practical decor piece for coffee tables in small spaces. I've painted these for friends who keep re-arranging their living room and hate fragile paper art. The gloss seal makes the yellow pop, but the half sunflower keeps it from taking over the whole table.
Start by scrubbing the tile and letting it dry fully. Paint a thin white or cream base layer only where the sunflower will sit, then draw the seed head circle in pencil lightly. Paint petals in two yellows, adding a mustard shadow along the inner petal edges. Dot the seed head with a dark brown paint pen or small brush, then seal with two thin coats of tile-safe clear gloss.
Good to knowUse a small foam brush for petals so you don't get streaks on the tile glaze.
Common mistakeAvoid thick paint layers - they feel bumpy and can chip around the edges.
18. Half Sunflower on Wall Planter Pot with Paint Marker Lines
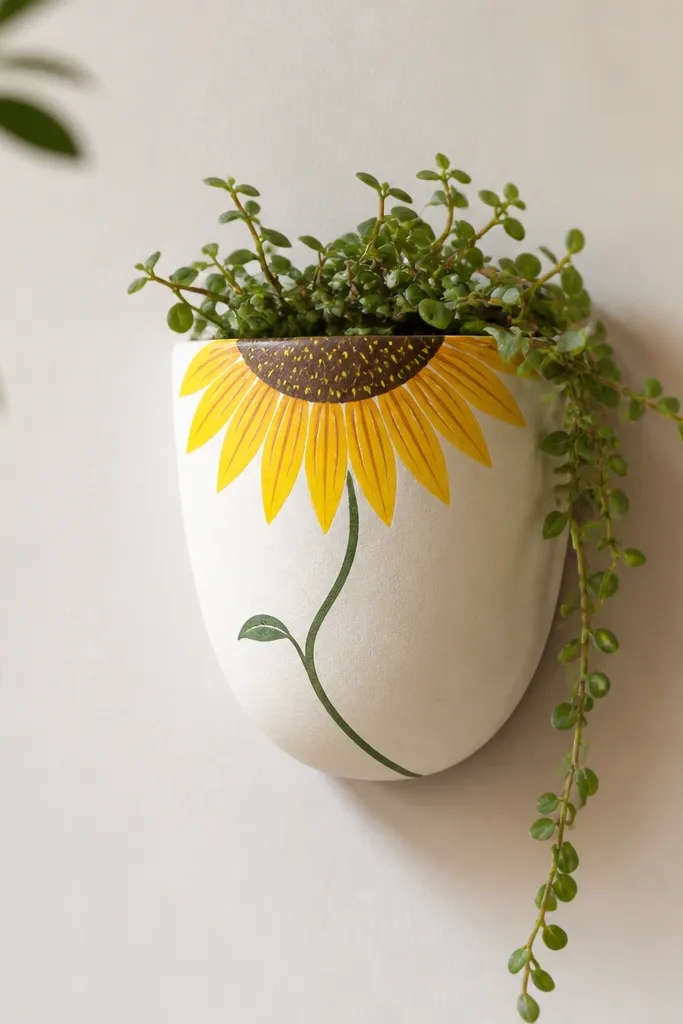
Paint markers give you tight, controllable lines on rounded surfaces. This half sunflower is perfect for small planters because the rim naturally crops the petals, so it looks like a designed pattern rather than a random decal. I've done it on off-white pots and the sunflower looks clean next to real plants - the green stem echoes leaf veins. It flatters spaces with lots of greens because the yellow adds warmth without looking neon.
Start by cleaning the pot and letting it dry. If the pot is glossy, scuff lightly with 220 grit so marker paint grips. Draw the seed head circle first with a dark brown paint marker, then add petals with yellow marker and one deeper mustard pass for shadows. Add a thin green stem line and one leaf near where the pot curve changes, then let it cure before you water plants near it.
Good to knowHeat-set marker paint with a hair dryer on low for a few minutes to speed curing.
Common mistakeAvoid drawing on wet paint or damp surfaces - marker lines smear on curved ceramic.
19. Half Sunflower on Notebook Cover from Scrapbook Paper Transfer
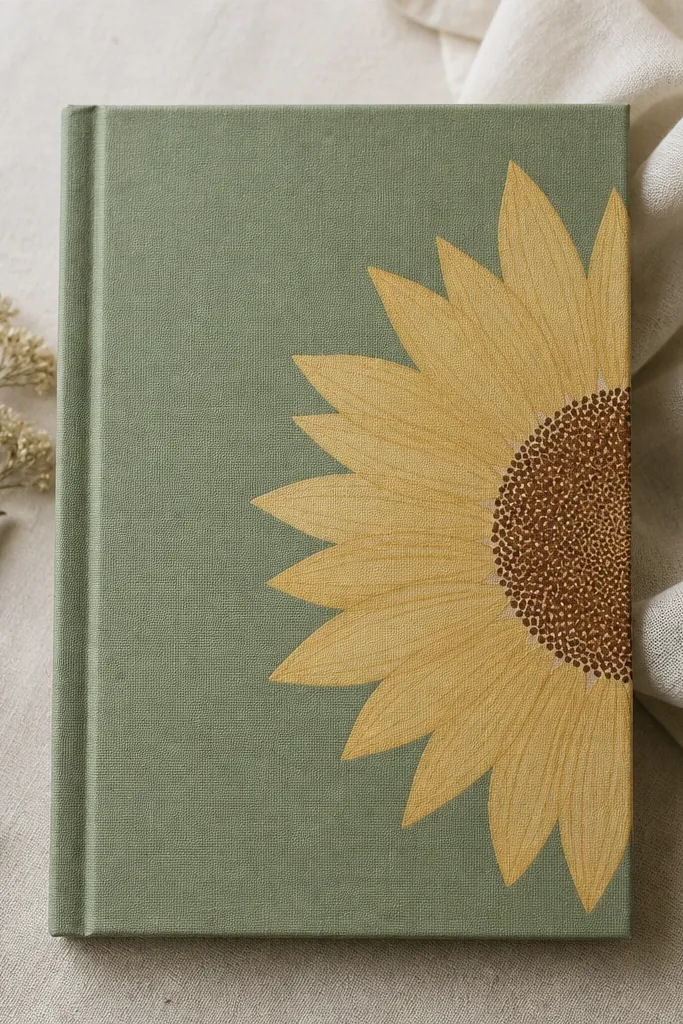
This is my go-to for when you want a clean print-like look but you're working with tiny materials. Paper transfer half sunflowers are tidy in small spaces because the edges are sharp and the sunflower reads as graphic. I've used scrapbook paper with sunflower patterns and layered it onto plain covers, then added a hand-drawn stem so it doesn't look like a sticker. It looks great on sage, dusty blue, and soft beige backgrounds because sunflower yellows feel warm, not loud.
Start by cutting the half sunflower from patterned scrapbook paper so the crop line sits straight where you want it. Apply a thin layer of decoupage medium on the notebook cover, place the cut paper down, and smooth from the center outward. Add a hand-drawn stem and leaf with fineliner so the design connects to the cover. Seal with two coats of decoupage medium, letting each coat dry before the next.
Good to knowTrim the paper edges with a craft knife before sealing so you don't get a raised border.
Common mistakeDon't use too much glue - it wrinkles scrapbook paper and the half sunflower edges look uneven.
20. Half Sunflower on Small Wall Clock Face with Black Petal Outline
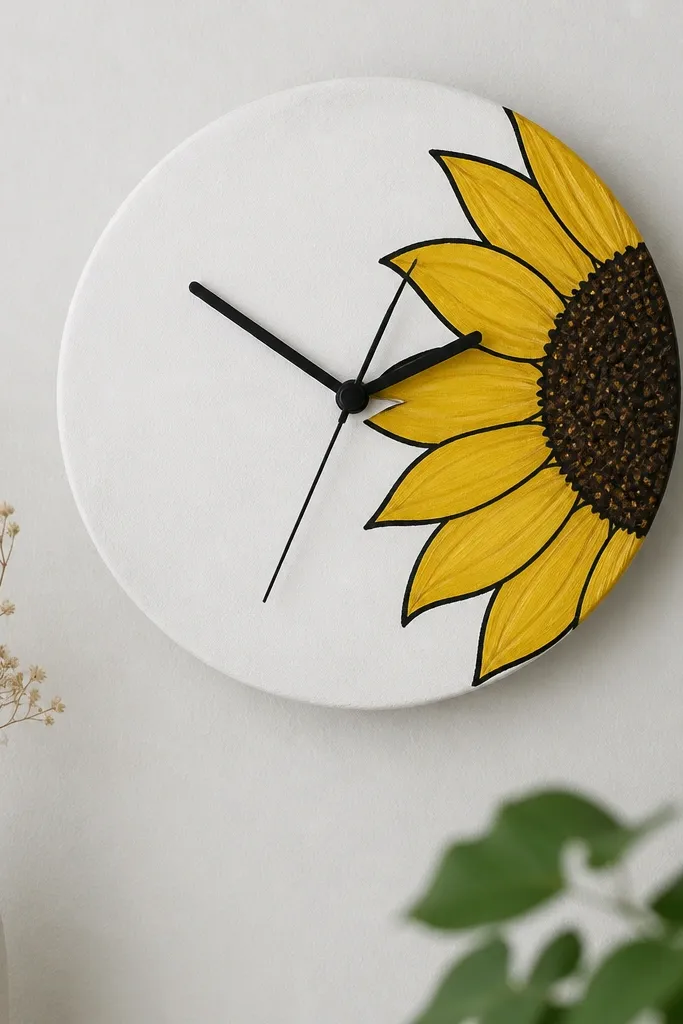
A clock face is already a focal point, so the half sunflower needs to be bold but controlled. Black outlines make the petals readable even when the clock hands cover parts of the design. I've done this on cheap thrift clocks where the face was blank, and the sunflower instantly made it feel custom. It's best for small rooms with minimal decor because the clock becomes the sunflower centerpiece without extra wall clutter.
Start by removing the clock hands carefully and cleaning the face. Paint a white base coat, then draw the half sunflower so the seed head sits opposite where your hands overlap most. Outline petals with a black fineliner or paint pen, fill with yellow acrylic in two tones, and add mustard shading near the petal bases. Dot the seed head with dark brown, then let everything dry fully before reattaching hands.
Good to knowTest the hands position by holding them in place before you commit to petal placement.
Common mistakeAvoid placing the seed head where the hands sweep - it gets visually messy.